-

Customer Experience -

Employee Experience -

Brand Experience -

Product Experience -

Core XM -

Design XM
Contacts Basic Overview
What's on This Page:
About Creating Contact Lists
Contact lists are mailing lists used to distribute survey invitations. Contact lists are also called panels or, simply, lists. They contain each contact’s name and email address, in addition to any other information you feel it’s important to include. The benefit of building a good, detailed contact list is that, in addition to making survey distribution easy, you can save information about your survey-takers ahead of time, and add it to their responses.
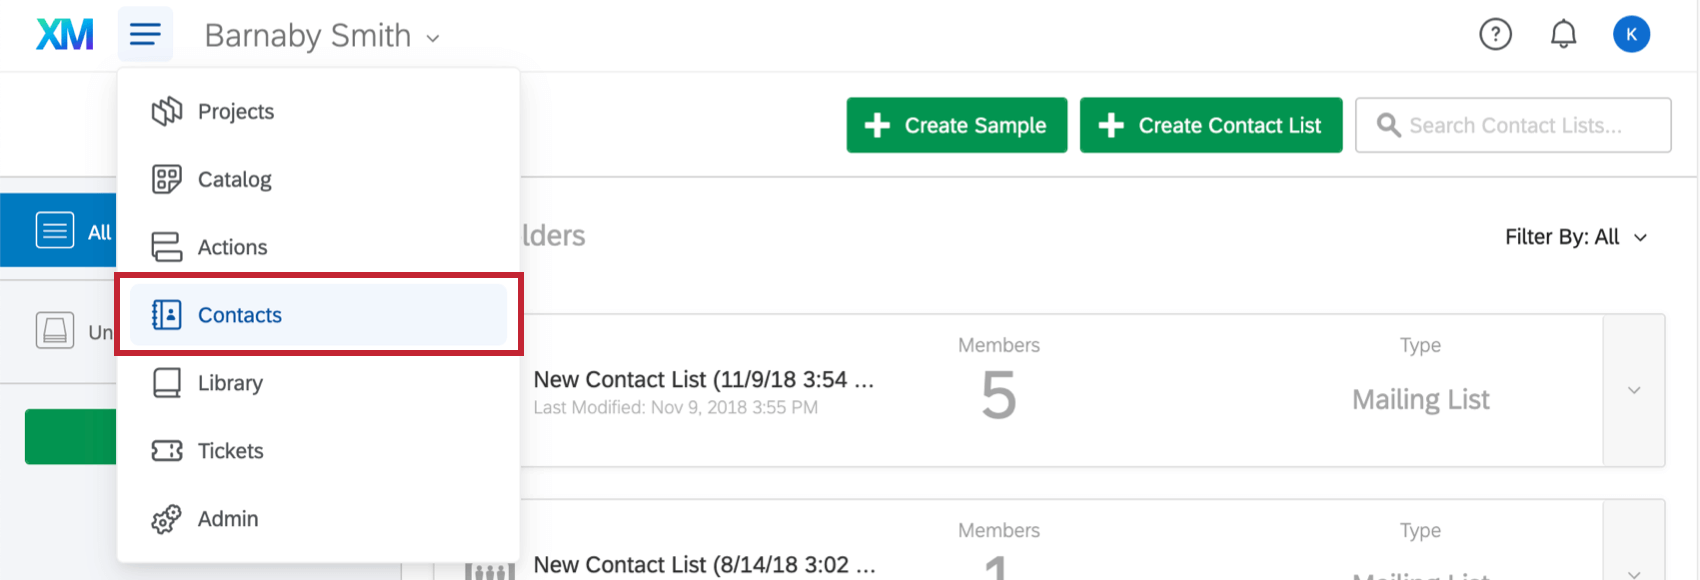
Contact lists are managed on the Contacts page, where you can create new lists, create samples of lists, and manage existing lists. Qualtrics has three options for building a contact list:
- Add contacts manually by typing them out within Qualtrics.
- Import contacts from a file.
- Import contacts from a survey.
Available Contact Fields
Whether you add contacts manually or by uploading a list, it’s important to consider the type of information you want to include about your contacts beforehand. You can add any information you want to your list, but we also have a few default fields you should be careful to name exactly as listed:
- Email: The contact’s email address. (This field is always required.)
- FirstName: The contact’s first name.
- LastName: The contact’s last name.
- ExternalDataReference: Extra information about the contact. This is most often used to store data such as an employee or student ID.
- Language: The language the user should see the survey in. This field has a pre-defined set of Available Language Codes. EN, for example, refers to English, while FR refers to French.
In addition to these five, you can add as many custom fields as necessary. Examples of fields you might want to add to your list include gender, state, country, occupation, position, supervisor, etc. Once these custom fields are added to your list, they are considered embedded data.
Embedded Data saved in your contact list can be attached to the responses of your contacts. That means before the recipient even starts the survey, you have information stored about them in the response, and don’t have to waste time asking for this information again. To include your custom fields in your reports and downloaded data, you must navigate to the survey flow and add an embedded data element for those fields.
Creating a Contact List Manually
- Go to the Contacts page.
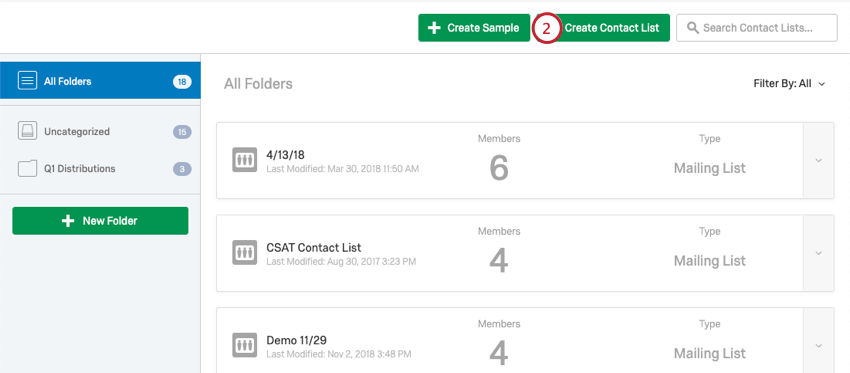
- Click Create Contact List.
- Name your contact list.
- Assign your contact list to a folder (if no folder is assigned, your list will be placed in the default “Uncategorized” folder).
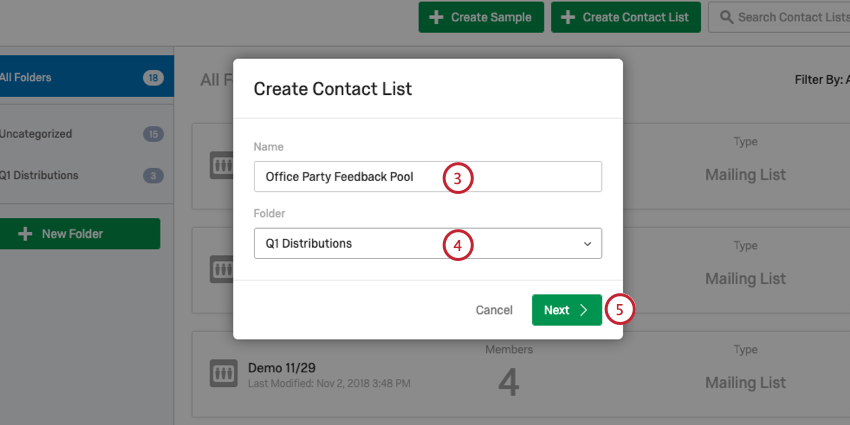
- Click Next.
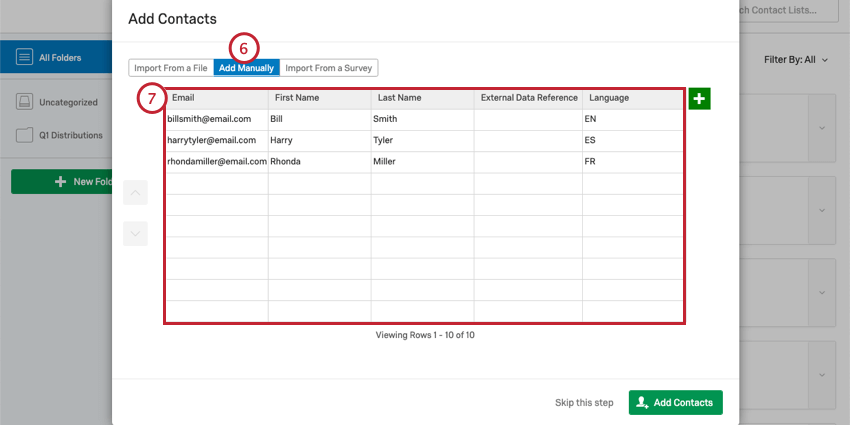
- Select Add Manually.
- Fill in the Email, First Name, and Last Name for your contacts. Optionally add extra information in the ExternalDataReference and Language columns.
- If desired, add additional fields (embedded data) by clicking the green plus sign ( + ).
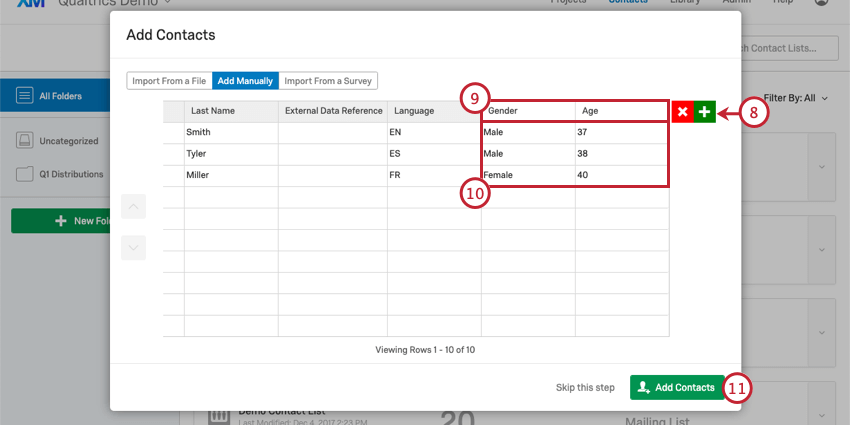
- In the first row, enter the name of the field. In this example, we added Gender and Age.
- Fill out the information for each contact.
- To finish, click the green Add Contacts button.
Importing a Contact List from a File
- Go to the Contacts page.
- Click Create Contact List.
- Name your contact list.
- Assign your contact list to a folder (if no folder is assigned, your list will be placed in the default “Uncategorized” folder).
- Click Next.
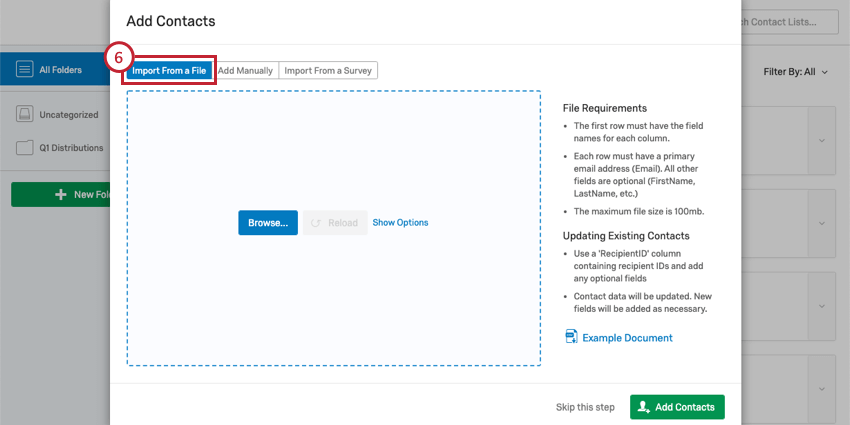
- Choose Import From a File.
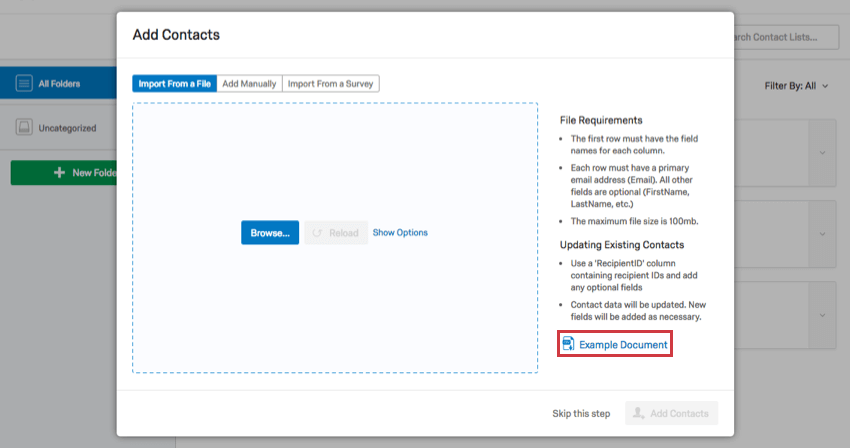
- Create a file in Excel or another spreadsheet software. Alternatively, you can download our example CSV contact list by clicking on the blue Example Document link.
- Make sure you have a column titled Email.

- Fill out / add other desired columns (FirstName, LastName, Language, custom embedded data fields, etc.). Note that order of columns doesn’t matter. However, spelling, capitalization, and spacing does matter.
- Add contacts to your spreadsheet, with one row for each contact (each contact must have an entry in the Email column, though other columns may have blank cells).
- Save the file as a CSV (Comma Separated Values) with UTF-8 encoding, or as a TSV (Tab Separated Values). Note that the maximum file size for a contact list upload is 100 MB.
- Back in Qualtrics, click Browse and select your file.
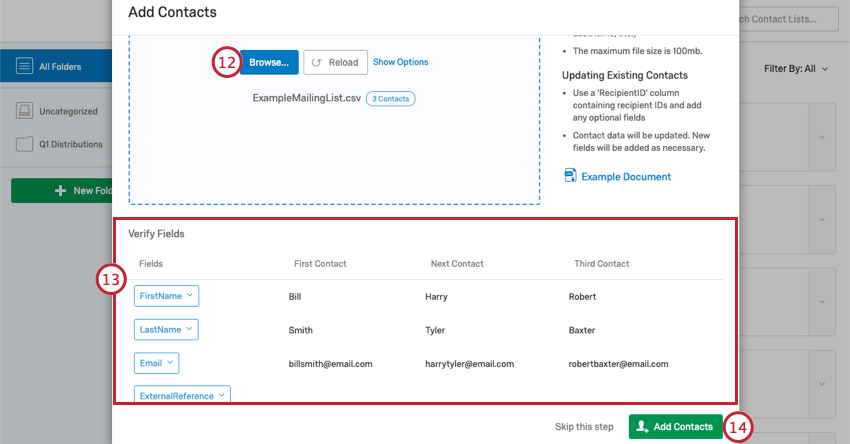
- Review the Verify Fields preview of your contact list. If a field has not been properly recognized, click on the field name to view a dropdown of options and select the correct field.
Qtip: If the data is not formatted correctly in the preview (e.g., bunched up instead of divided into columns), your data may not be separating (or “delimiting”) correctly. To fix, select the blue Show Options link and choose a different Delimiter and/or Enclosure.

- Click Add Contacts.
Importing a Contact List from a Survey
You can also create a contact list from contact information you collected in a survey.
- Go to the Contacts page.
- Click Create Contact List.
- Name your contact list.
- Assign your contact list to a folder (if no folder is assigned, your list will be placed in the default “Uncategorized” folder).
- Click Next.
- Choose Import From a Survey.
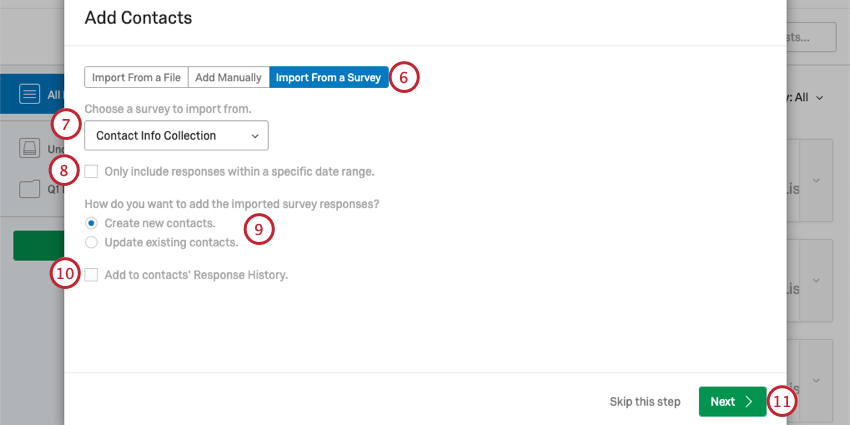
- Select a Project to import contact information from.
- Select Only include responses within a specific date range if you want to limit which responses you’re building a contact list from.
- Select either to Create new contacts or Update existing contacts.
- If desired, select to Add Contacts’ Response History.
- Click Next.
- Fill out the Question and Response (part of the question) that corresponds to each piece of information.
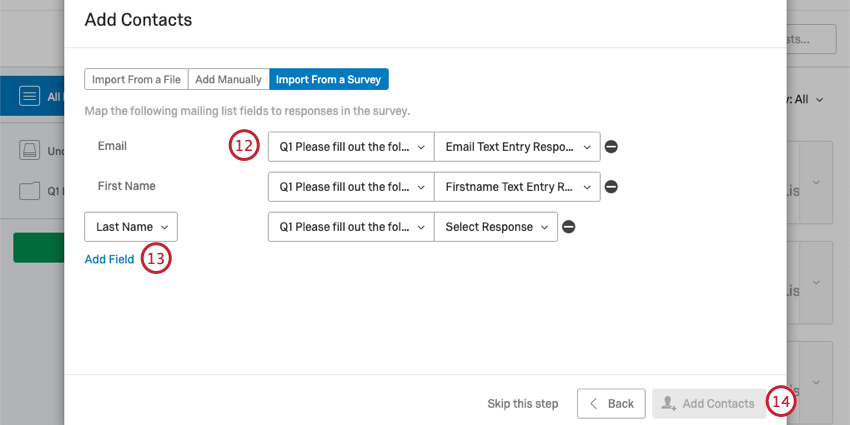
- Click Add Field to add additional fields such as embedded data, ExternalDataReference, or the respondent’s Language. Click the minus sign next to a field to remove it.
- When finished, click Add Contacts.
Using Contact Lists in Distributions
Now that you’ve created your contact list, let’s talk about all the ways you can use them to distribute your surveys.
- Emailing Survey Invitations: Before you can email your survey to respondents, you need to know who those respondents are. Once you build a good contact list, you can send an invitation to your list members through Qualtrics. The benefit of emailing a contact list in Qualtrics is that you can also send reminders and thank you emails, track your distribution status, customize emails based on personal information, and much more.
- Generating Personal Links for Another Mailer: If you’re going to use a mailer other than Qualtrics, but still want your recipients to get personalized links, this the best option for you.
- Sending Surveys through SMS: Distribute surveys through automated text messages. Depending on how you format your survey, you can either just text your recipients a link to the survey, or text them an interactive survey experience. Just remember to add a Phone column to your contact list!
- Making Respondents Authenticate Before They Take a Survey: By adding an authenticator to your survey, you can require respondents log in (confirm their identity) before they take the survey. Thus, you can use one, general link for your survey, while still keeping responses personalized.
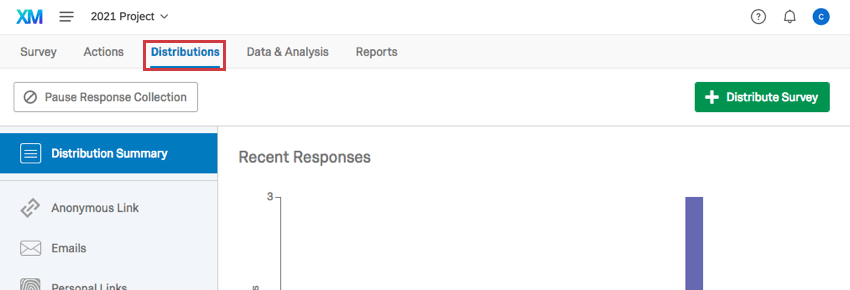
Emailing a List
The best way to send an email to a contact list is to head on over to the Distributions tab of your survey. From there, you can send survey invites to your contacts.
However, if you’d like to email a contact list without including a survey link, you can do this right inside the contacts list.
Emailing without a Survey Invite
- Go to the Contacts page.
- Find the list you want to email.
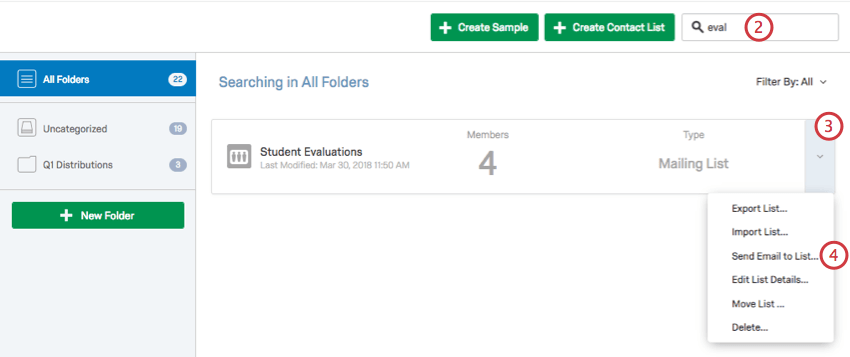
- Click the dropdown arrow.
- Select Send Email to List.
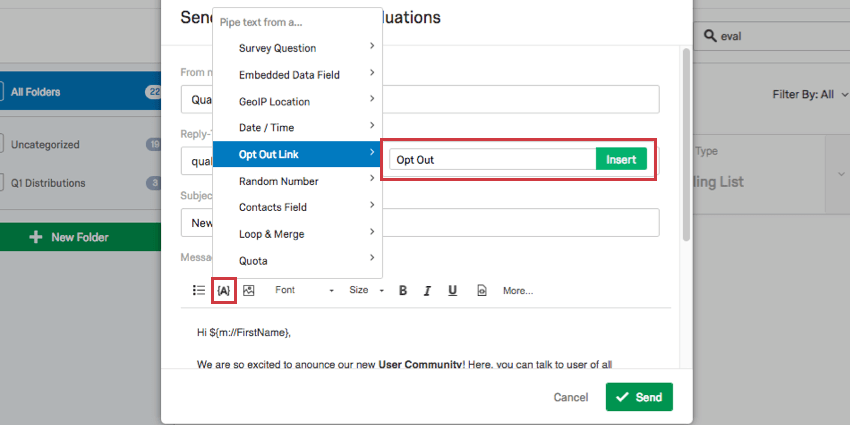
- Compose your email.
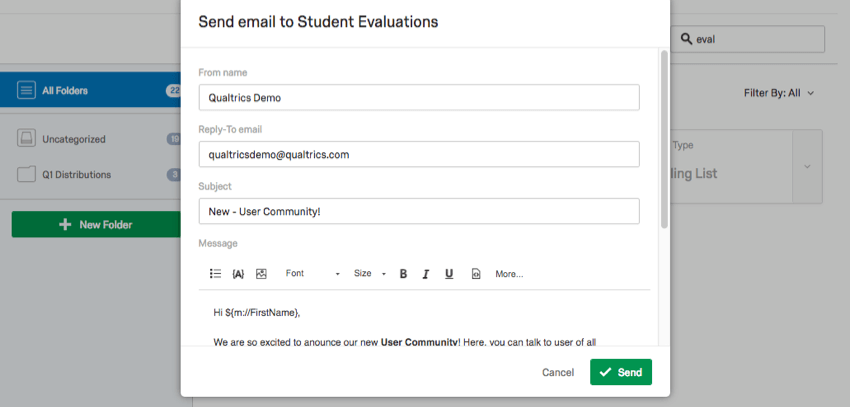
Attention: In order to comply with the federal CAN-SPAM Act, it is advised that you include an opt out link in every email that you send to individuals outside of your organization.
Managing Contact Lists and Samples
The Contacts page isn’t just for making new lists – it’s also for managing the ones you’ve already made. Check out these pages for more information on managing contacts and creating samples.
- Purchasing Contact Lists / Respondents: Providing panels to researchers has turned into a robust industry. If you’re interesting in purchasing a panel from Qualtrics, reach out to our Research Services team here.
- Edit Contacts in a List: Learn to import updates to a contact list, add more contacts, delete contacts, subscribe and unsubscribe contacts, and consolidate duplicates.
- Manage Multiple Lists: Learn to delete lists, filter list contacts, export lists, share lists, or move lists into folders.
- Creating Samples: Learn to break existing lists into subsets.