-

Customer Experience -

Employee Experience -

Brand Experience -

Product Experience -

Core XM -

Design XM
Text iQ Functionality
What's on This Page:
About Text iQ Functionality
Text iQ is Qualtrics’ powerful text analysis tool. Text iQ allows you to assign topics to feedback you’ve received, perform sentiment analysis, report out on your results with dynamic widgets, and more!
This page discusses spellcheck and lemmatization capabilities of Text iQ, what options are available to Basic vs. Advanced clients, and how to navigate the Text iQ interface.
Basic vs. Advanced Text
This section explains the differences in the features accessible to Basic versus Advanced text clients.
| Basic | Advanced | |
| Response Limit | 20,000 Responses per survey | Unlimited Responses per survey |
| Summary Mode | No | Yes |
| Edit Mode | Yes | Yes |
| Search Responses | Yes | Yes |
| Create / Edit Topics | Yes | Yes |
| Hierarchical Topics | Yes | Yes |
| Widgets | No | Yes |
| Recommended Topics | No | Yes |
| Sentiment Analysis | No | Yes |
| Query Builder | No | Yes |
| Translate Comments | No | Yes |
| Text-iQ Powered Survey Flows | No | Yes |
Uploading Data to Text iQ
The first time you visit Text iQ in a survey, you have to upload your data. This process must be repeated for each survey you create, even if you have previously set up Text iQ in a different survey.
Use the checkboxes to select which open-ended text fields you would like to upload to Text iQ. Only questions or other compatible fields, such as a Text Variable Type Embedded Data field, will appear here. You can choose to upload all fields or select only specific fields.
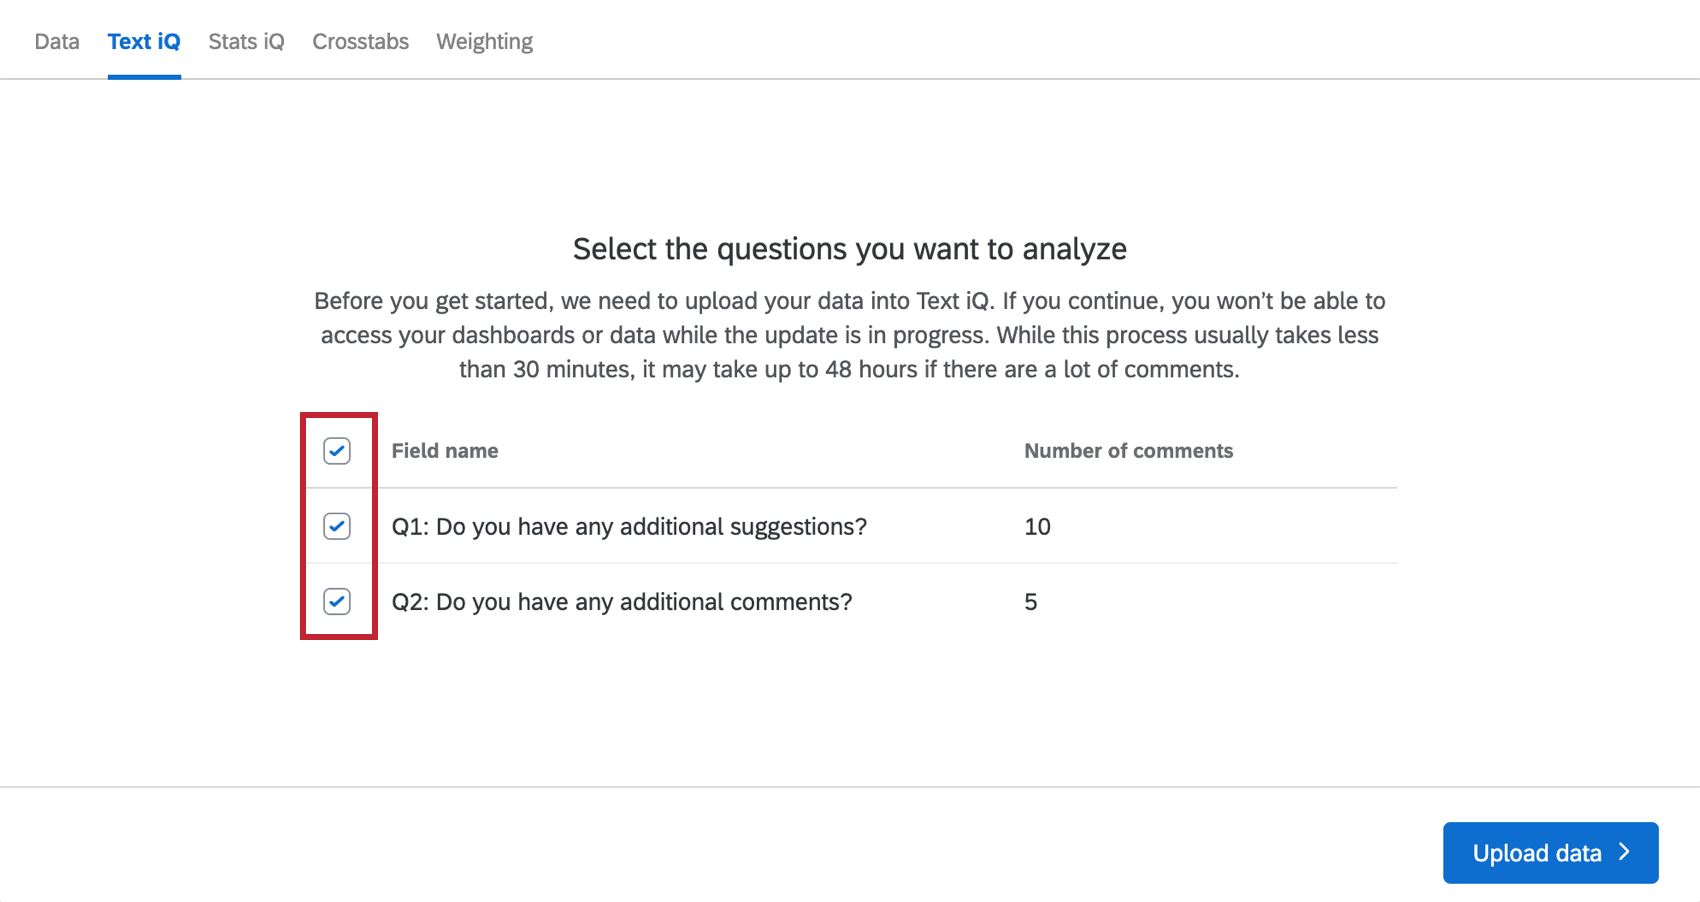
When you have finished selecting your fields, click Upload data. While the upload is in progress you won’t be able to access your dashboards or data.
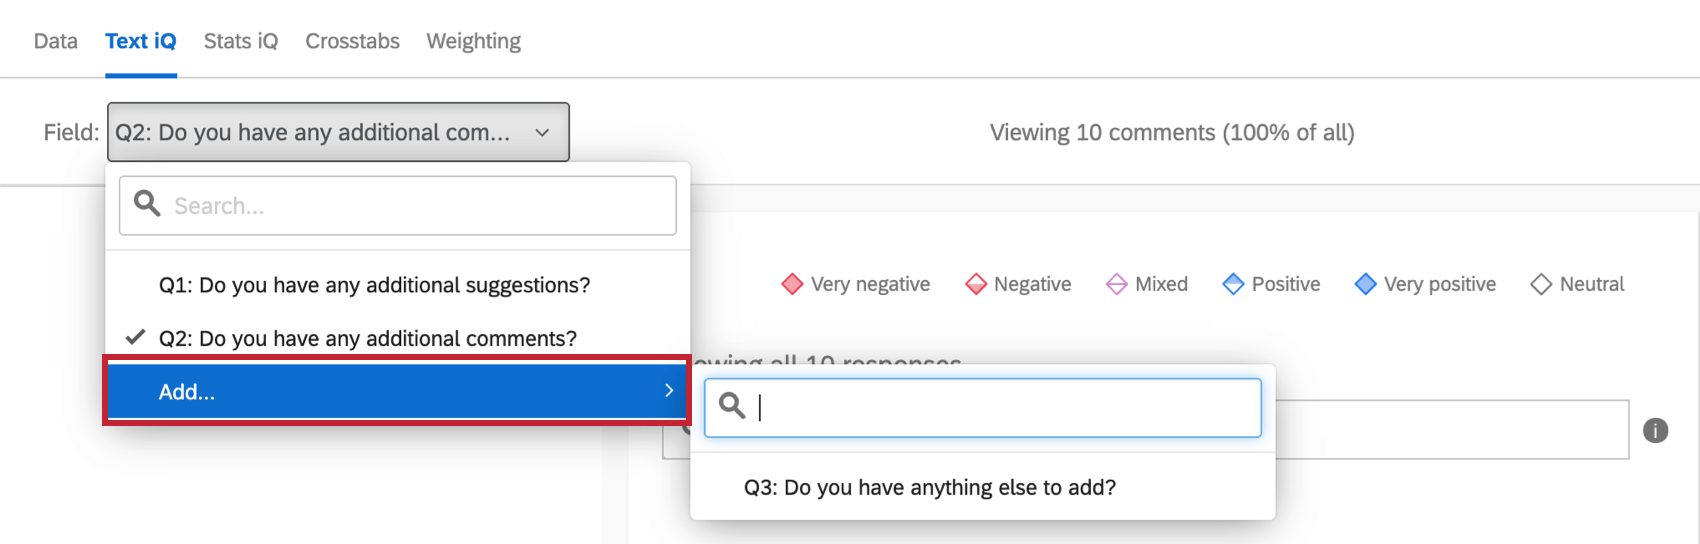
Additional text fields can also be added after your data is first uploaded to Text iQ. Use the Field dropdown to add fields to Text iQ.
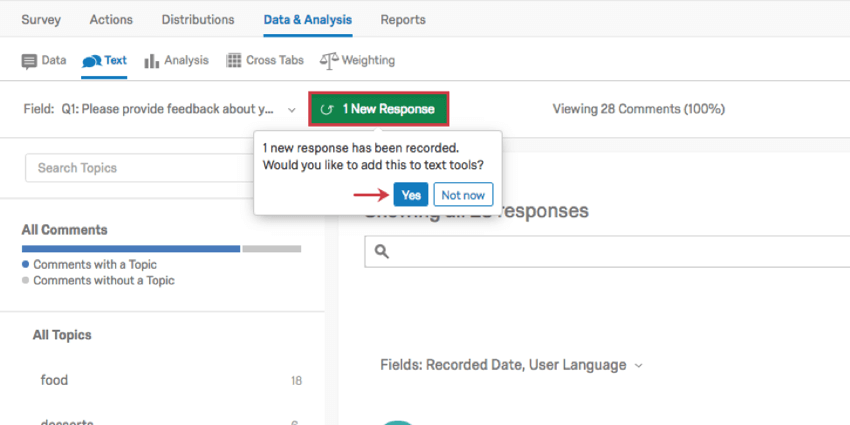
Adding New Responses
Editing Mode & Applying Changes
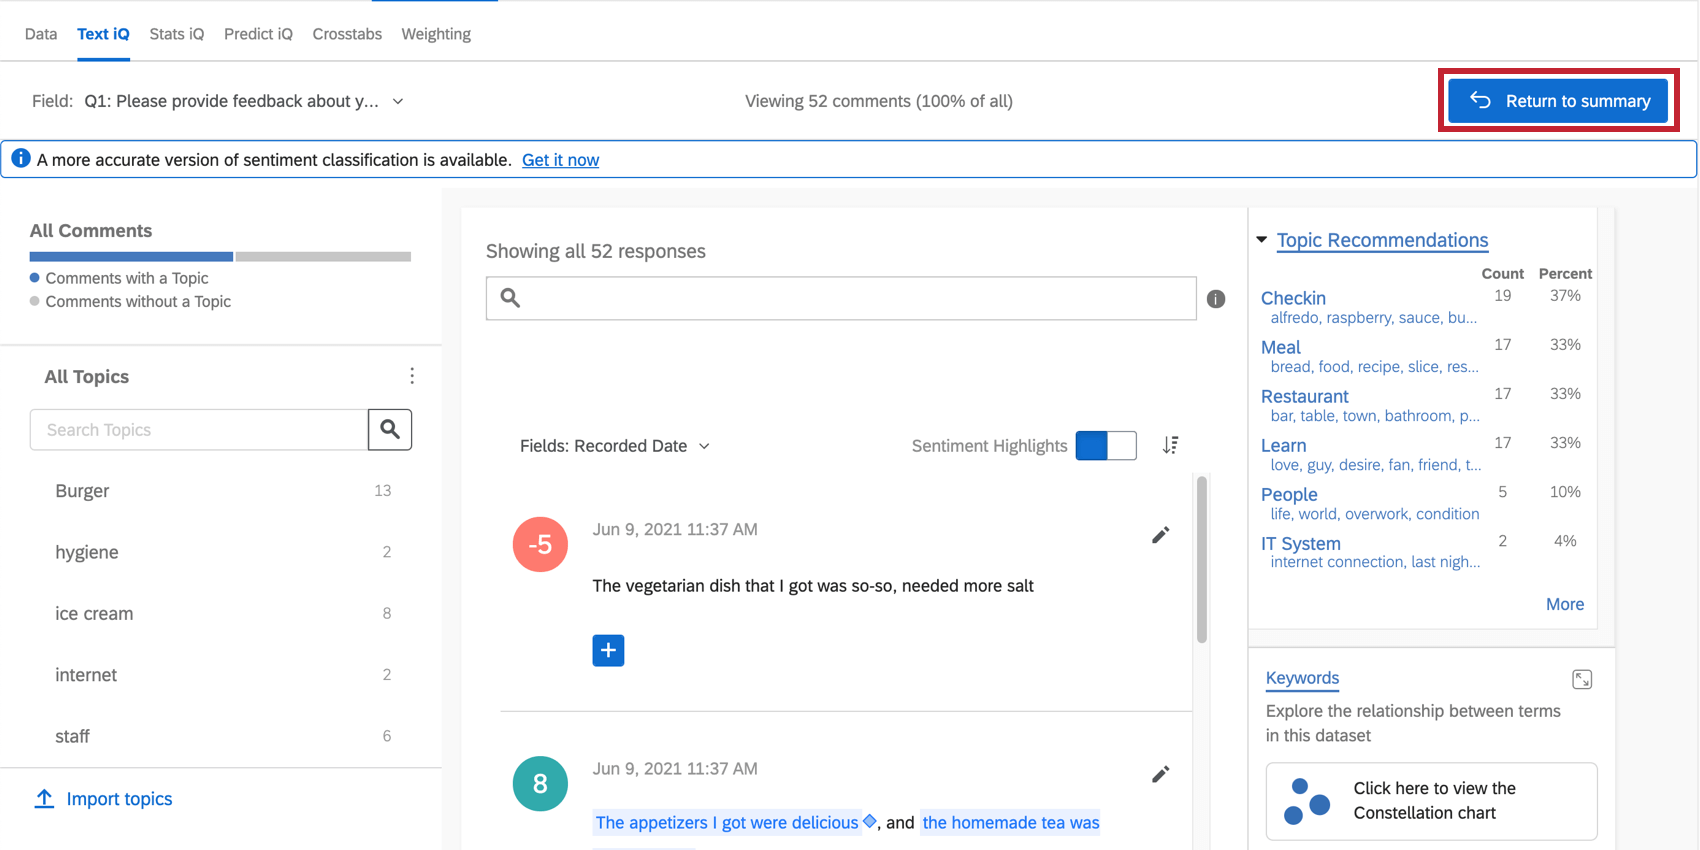
Before you can start adding topics and widgets, you have to put Text iQ in editing mode. Editing mode can be accessed by clicking Edit topics in the upper-right.
Once this button changes to “Return to summary,” you are ready to start editing!
Saving Your Edits
There are a lot of features in Text iQ, and therefore a lot of edits you can make. You can change how feedback is tagged by topic, your sentiments, and more. However, you don’t want resulting changes to take place immediately, since waiting for each change to implement can be time consuming.
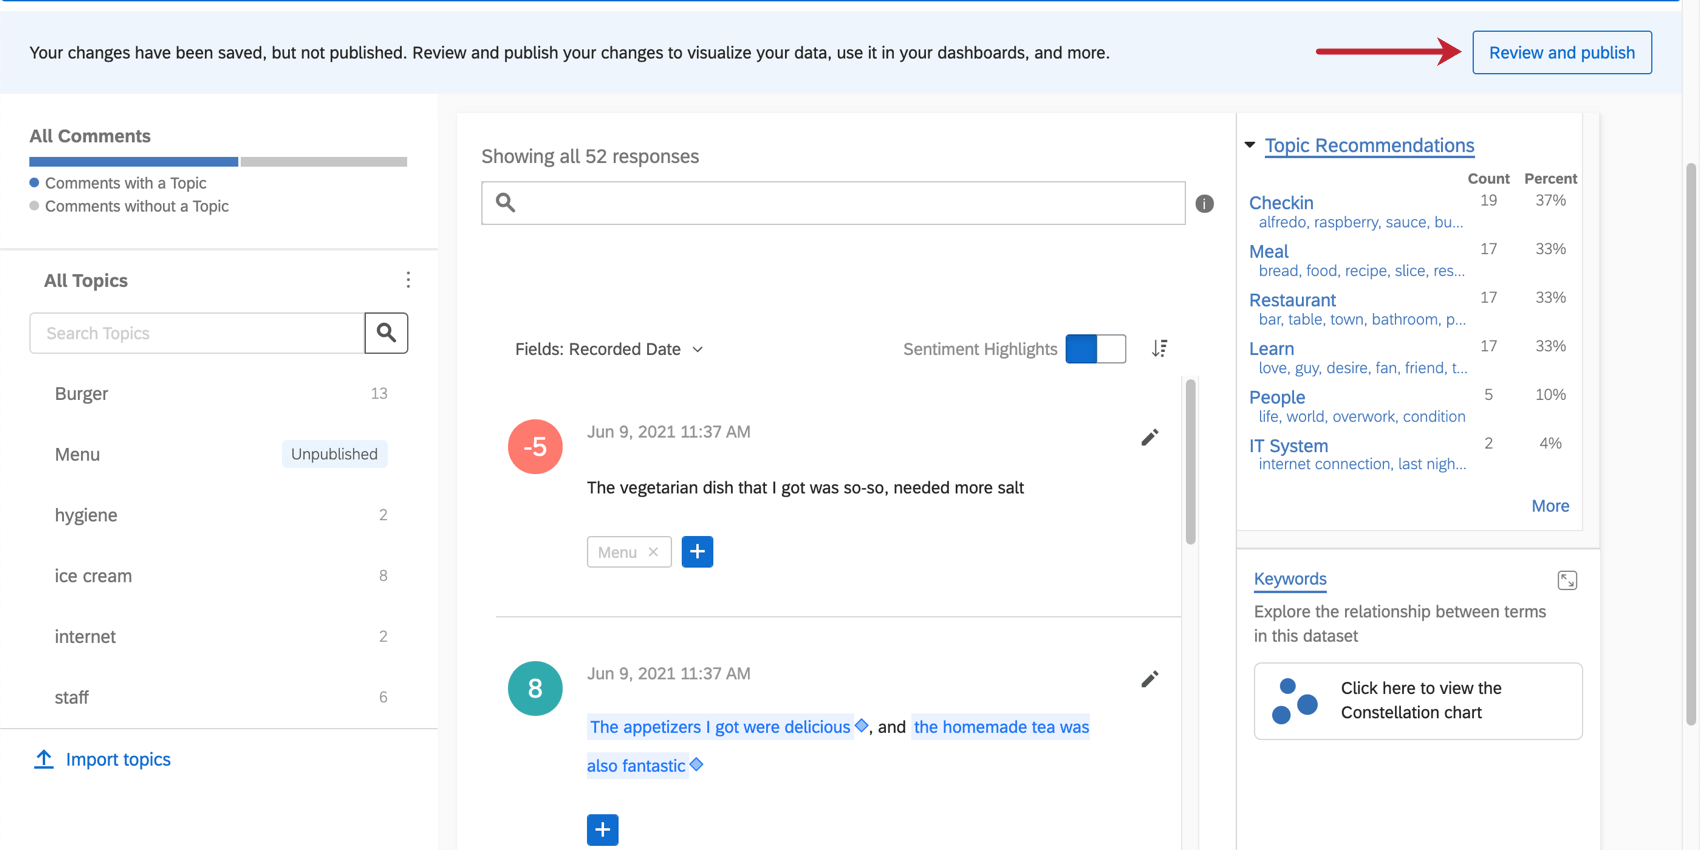
If you’ve made edits, a banner will appear explaining that your changes have been saved, but not yet applied to the data set. This means your changes aren’t reflected in any of your reports or dashboards yet.
After you’re done editing, click on the Review and publish button in the upper-right.
Before your changes are applied, a summary of your proposed changes will appear. You can review these before deciding to either:
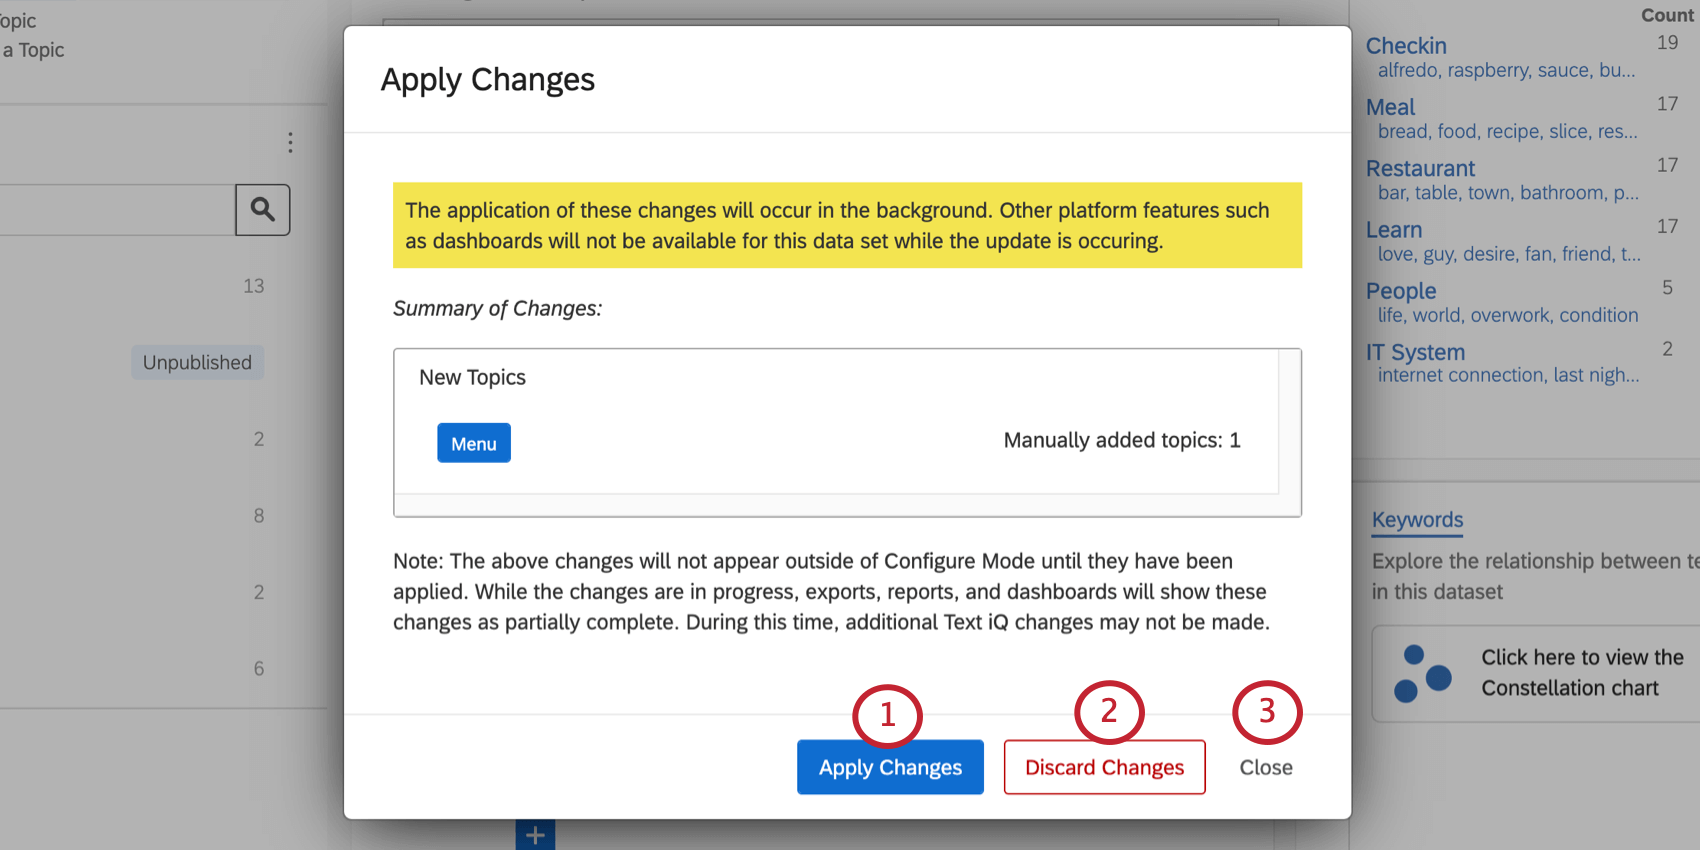
- Apply Changes: Save these changes.
- Discard Changes: Cancel the changes you’ve made and go back to the original version.
- Close: Go back to analyzing your text. This allows you to make additional changes on top of the one in the Change Summary before you save them.
Once you save, Qualtrics will take care of the rest. You are free to use other parts of the site while your changes are processed.
Navigating Text iQ
Let’s outline all the components of Text iQ.
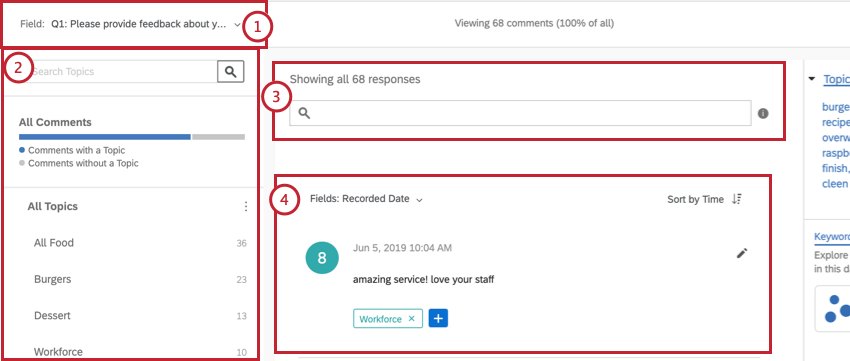
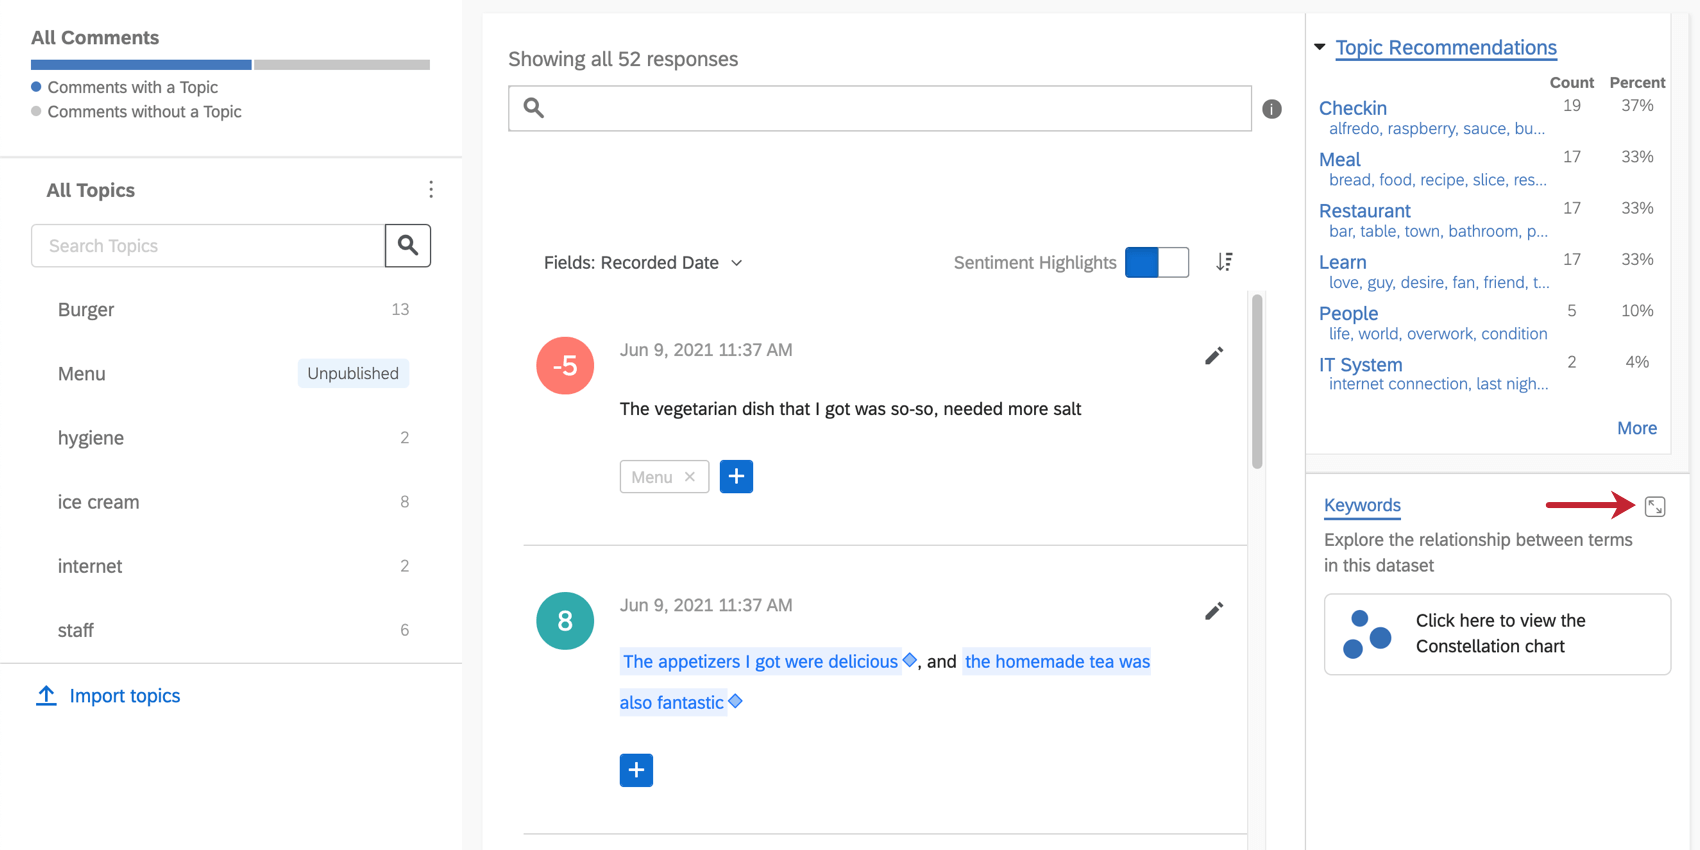
- Use the Field dropdown to select which text responses you are analyzing. Every time you log in, Text iQ will remember what field you were on last time.
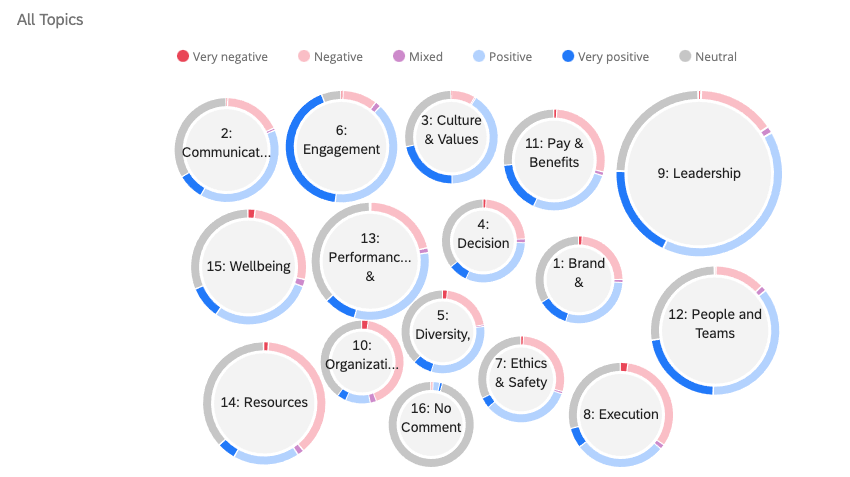
- The menu to the left allows you to select different topics so you can view the responses tagged with that topic or change the topic’s criteria. You can also view untagged responses and search the names of existing topics.
- This search bar can be used to search through responses, build sophisticated queries, and create new topics. See the Searching Text Responses page.
- A list of responses. When you first log on, this is every response, but you can use the topics to the left to narrow them down. Every response appears with a sentiment, topics, and other information.
- This sidebar contains Topic Recommendations for topic-building and the option to add a constellation widget. It can be expanded and collapsed as needed for viewing results or adding widgets.

Changing the Comment View
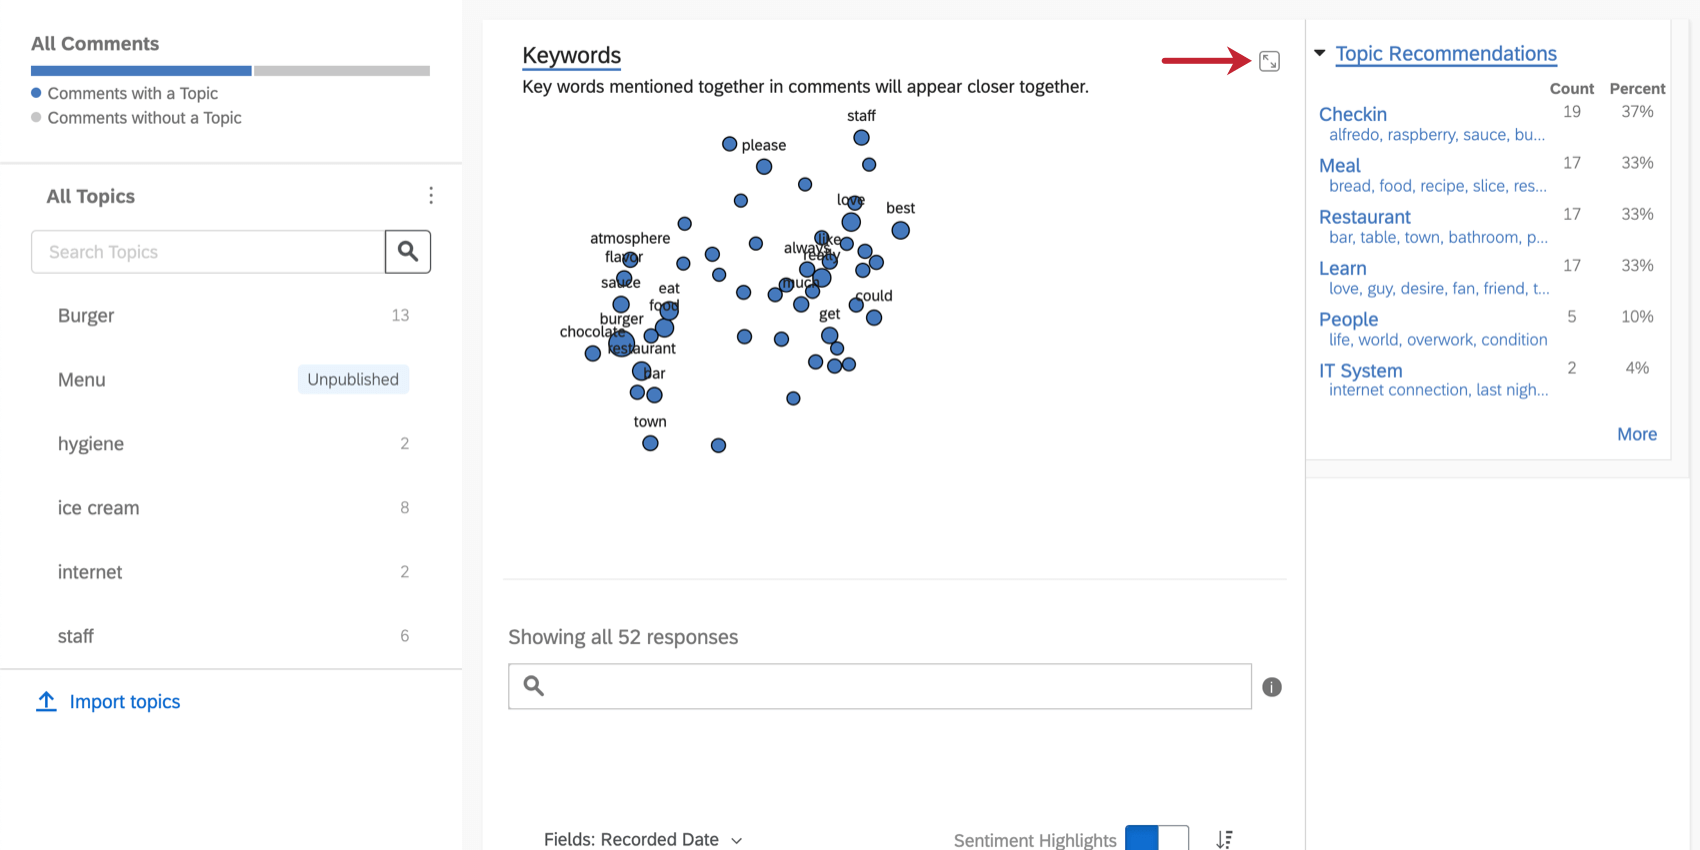
Once you enter editing mode, widgets will collapse into the sidebar on the right. This allows you to view the results of your topic edits easily. However, you may wish to view and create widgets instead.
Click the expand button to move your widgets back into view.
You can put your widgets into the sidebar and go back to editing topics by clicking the expand button on the right of the constellation widget.
Viewing Responses in Text iQ
Each response comes with a Sentiment Score (the number in the bubble), the response itself, and a list of the topics it’s been tagged with.
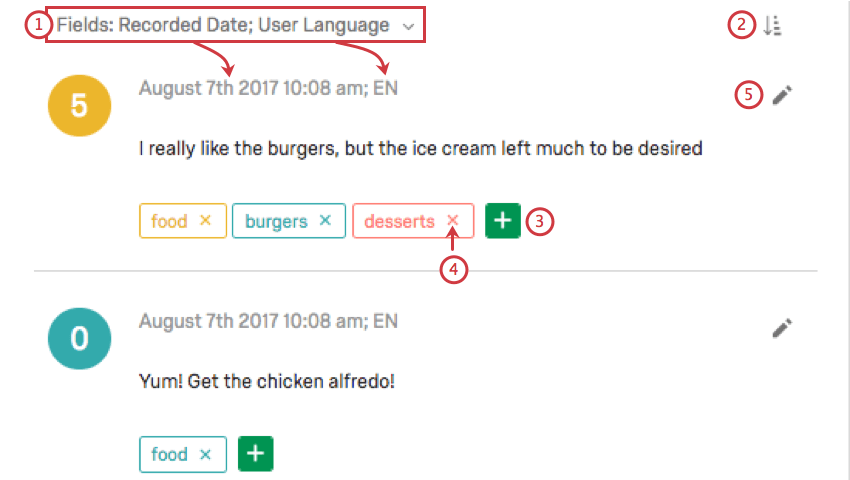
- In the upper-left, determine what Embedded Data or Survey Metadata (e.g., the date the response was recorded, the user’s language, the survey’s duration) is displayed at the top of the response.
Qtip: You cannot add Contact Information here unless it’s been added as Embedded Data.
- In the upper-right, sort the responses by time. This is when the survey response was recorded, not started or finished. (For example, an imported response may have been completed in 2013, but uploaded and thus “recorded” in 2017.)
- Click the blue plus sign ( + ) to add another topic to the response. You can select an existing topic, or type something new. Press Enter on your keyboard when you’re done typing.
- To remove a topic from the response, click the X on the topic.
- Click the edit button to view topics and edit sentiments.
Lemmatization
Lemmatization is the process of breaking words down in order to capture the base roots of the word, then identifying all derivatives and conjugations for that word in order to provide more robust results. For the Text section, lemmatization is used to ensure that your responses are tagged correctly without you having to use complicated query searches.
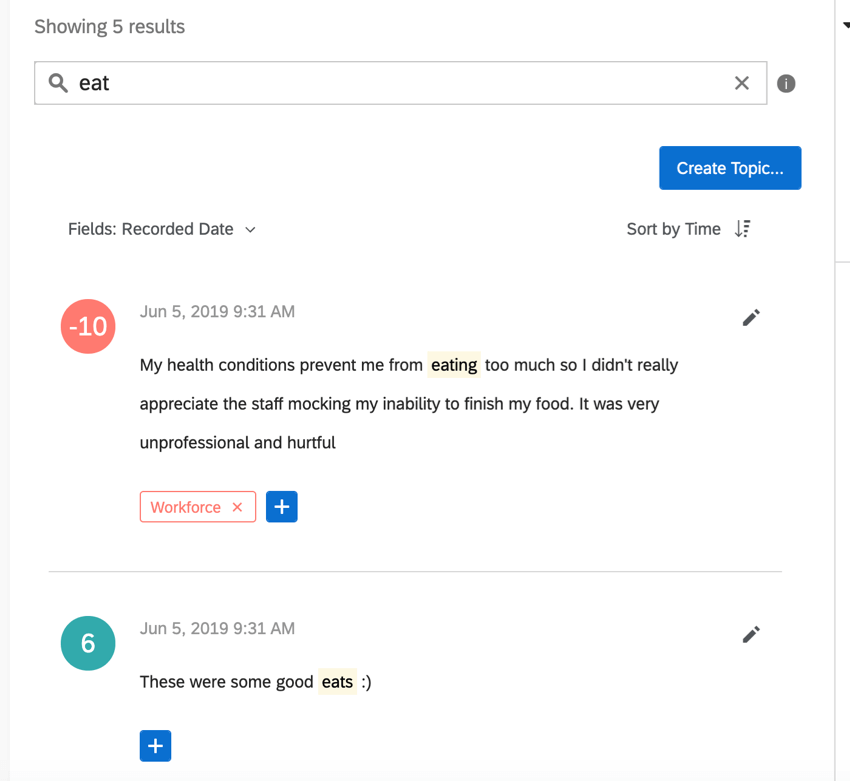
As an example, let’s consider that we want to capture all the comments from our restaurant’s NPS® survey that mention eating and food.
In other keyword search tools, you might have to develop some long query string that includes the various iterations of eat (eating, eats, etc). However, with Text, the system uses lemmatization to break all those words down to the core base word, “eat,” and then tags responses appropriately.
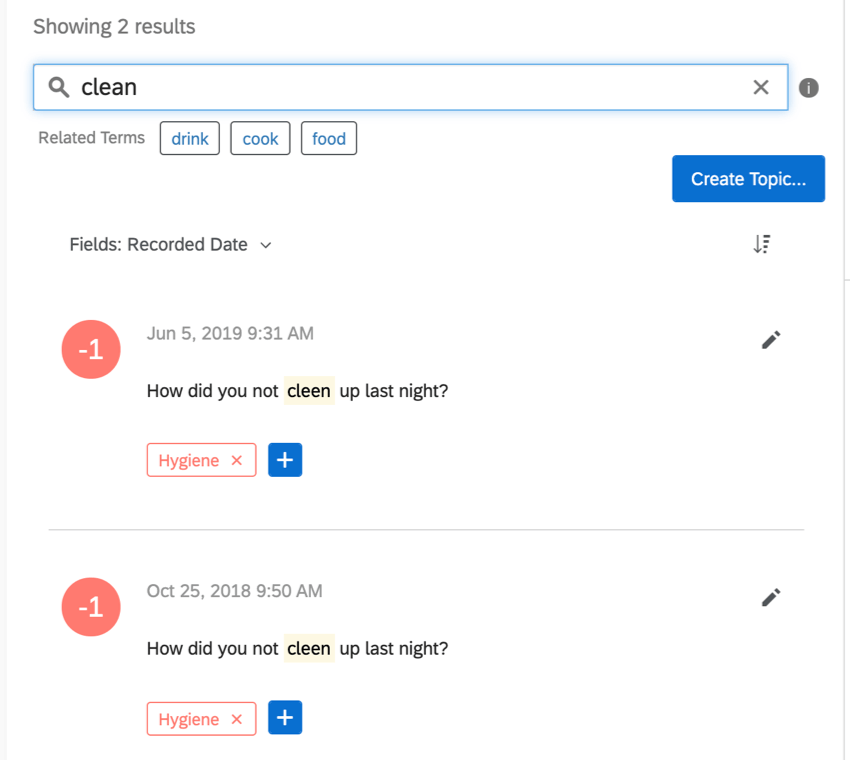
Spell Check
The Text section also includes a basic spell checking system to ensure that all your responses get tagged correctly, even if the respondent has misspelled or incorrectly capitalized a word.
For example, let’s look at our restaurant again. If we want a topic about cleanliness, you can bet that there will be a few misspelled words. However, the Text spell check will still capture the misspelled words and tag them, so you don’t have to worry about any responses falling through the cracks.
Data Set Rebuilds Necessary
There may be times that Text iQ asks you to update the data set. A data set update is different than the usual changes you make and apply in the Text iQ platform. The big difference is that data set updates cause your data set to reindex, which results in the temporary inability to access not only Text iQ itself, but the data set the text responses come from. If you are using Text iQ in a survey, that means the survey’s Data & Analysis tab will be unusable until the update ends. If you are using Text iQ in a CX dashboard or employee engagement project, the dashboards will not display data until the update ends.
For most users the update will take less than 30 minutes, but for data sets that include lots of responses, this process can take up to 48 hours. We provide advanced warning so you can navigate away and delay the update if desired, or follow the directions to start the data set update.
Request to Update Data Set
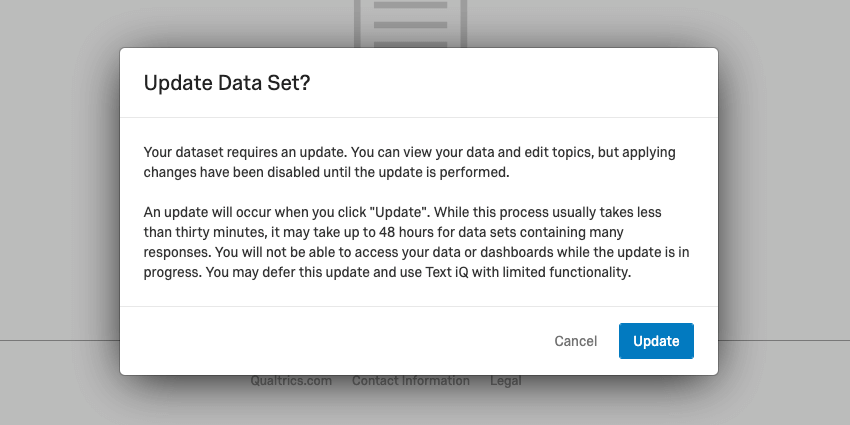
Text iQ may give you an “Update Data Set?” window if you’re visiting a question for the first time in Text iQ. This is a question (or another compatible field, such as a Text Variable Type Embedded Data field) you’ve never analyzed in Text iQ, even if you’ve used Text iQ on other questions in the same survey / dashboard before.
This window may also appear if there is an issue with the way data was mapped in a dashboard – for example, if you changed a Field Type – or if you make a change that utilizes analysis features you weren’t using previously. An example of using new analysis features includes adding parent topics, or topic-level sentiments.
To defer the update, click Cancel. To start the update, click Update.
Warning When You Apply Changes

When you go to apply your changes, you may also get a warning that pushing changes will require a data set update. This likely happened because you were editing topic hierarchies. For example, nesting topics under a parent topic, removing a topic from a parent, or creating a new parent topic.
Click Apply Changes to push the update. Click Close to return to Text iQ and make additional changes before you start the update.