-

Customer Experience -

Employee Experience -

Brand Experience -

Product Experience -

Core XM -

Design XM
General Look & Feel Settings
What's on This Page:
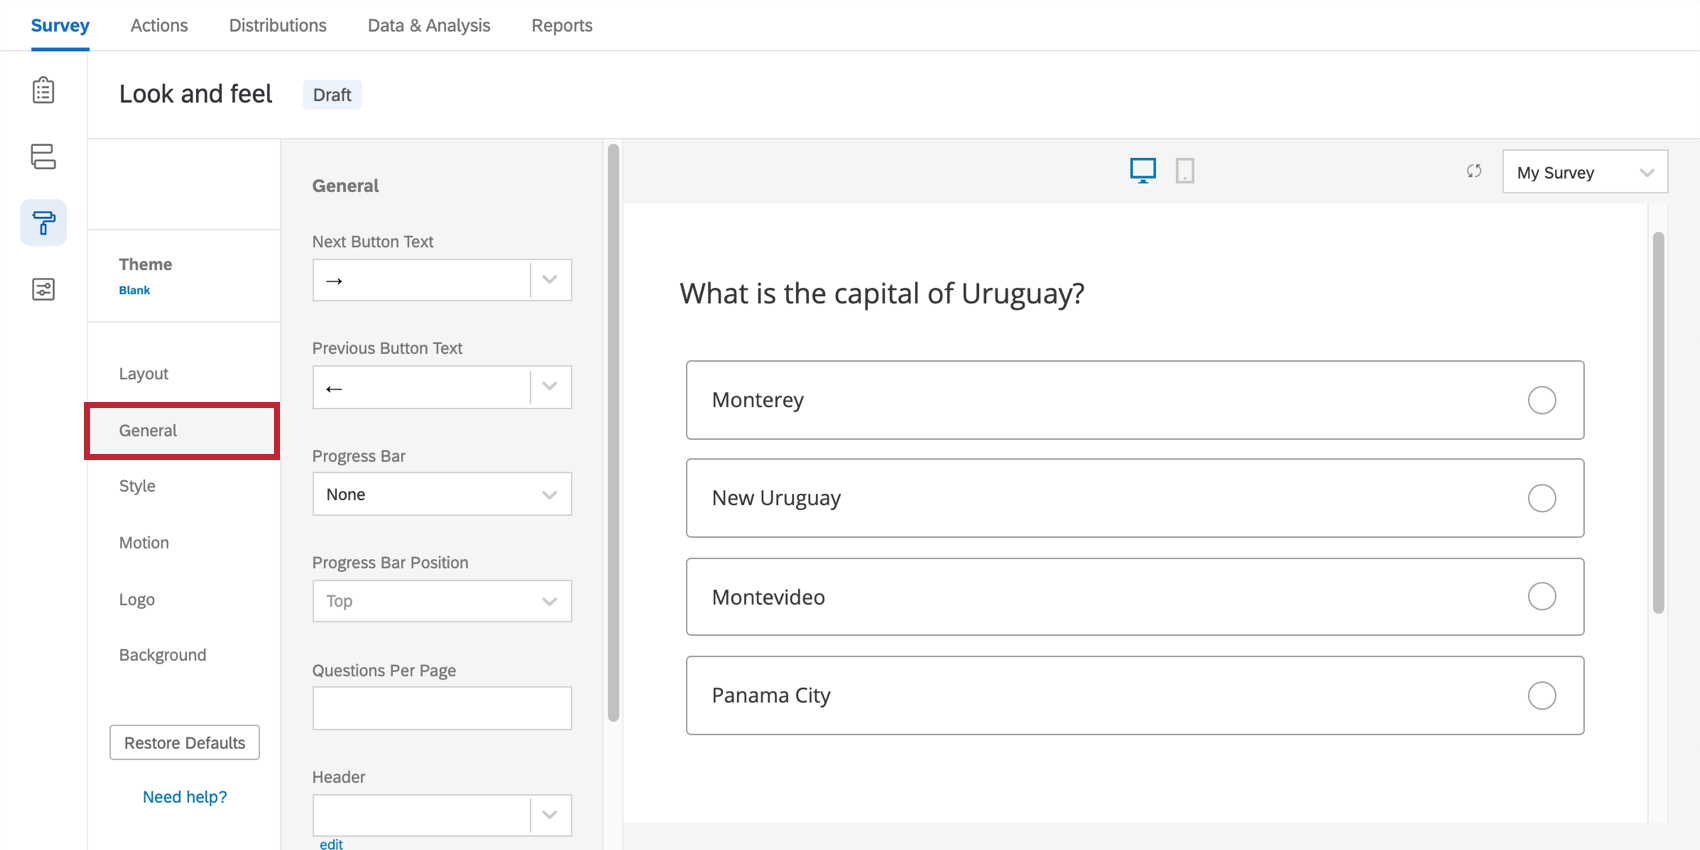
About General Look & Feel Settings
The General section of the Look and feel menu contains options for changing key aspects of your survey’s appearance. These options include changing the next and back button text, adding a progress bar, limiting the number of questions per page, and adding a survey header or footer.
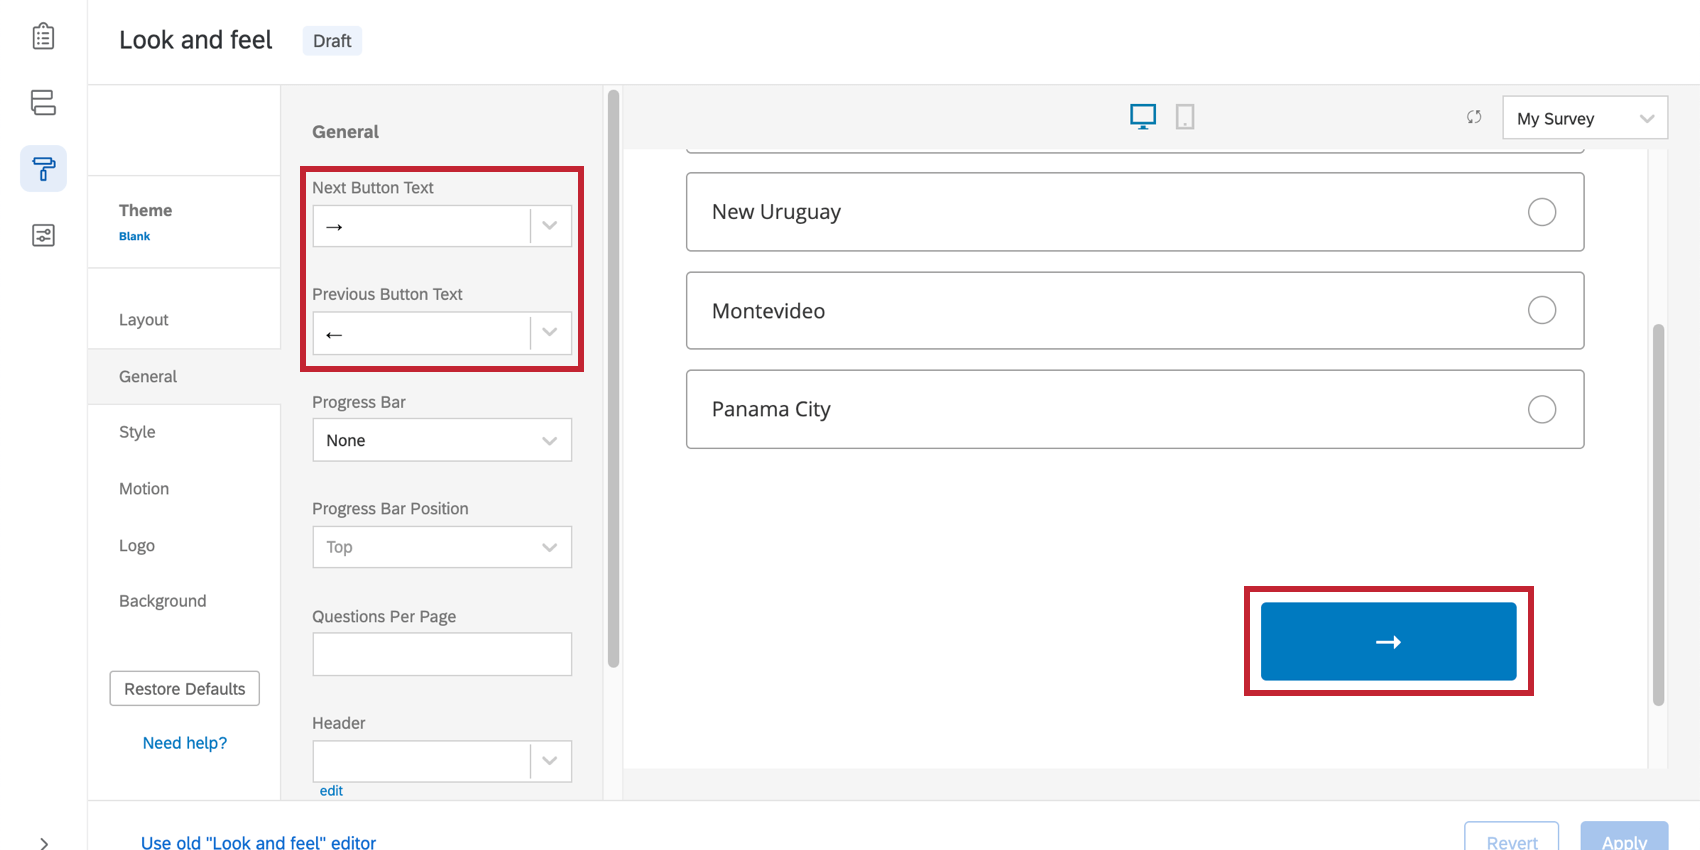
Changing Next and Back Button Text
By default, the buttons at the bottom of each page will show → and ← to cater to an international audience. These buttons can be customized with your own wording.
To change button text for the entire survey
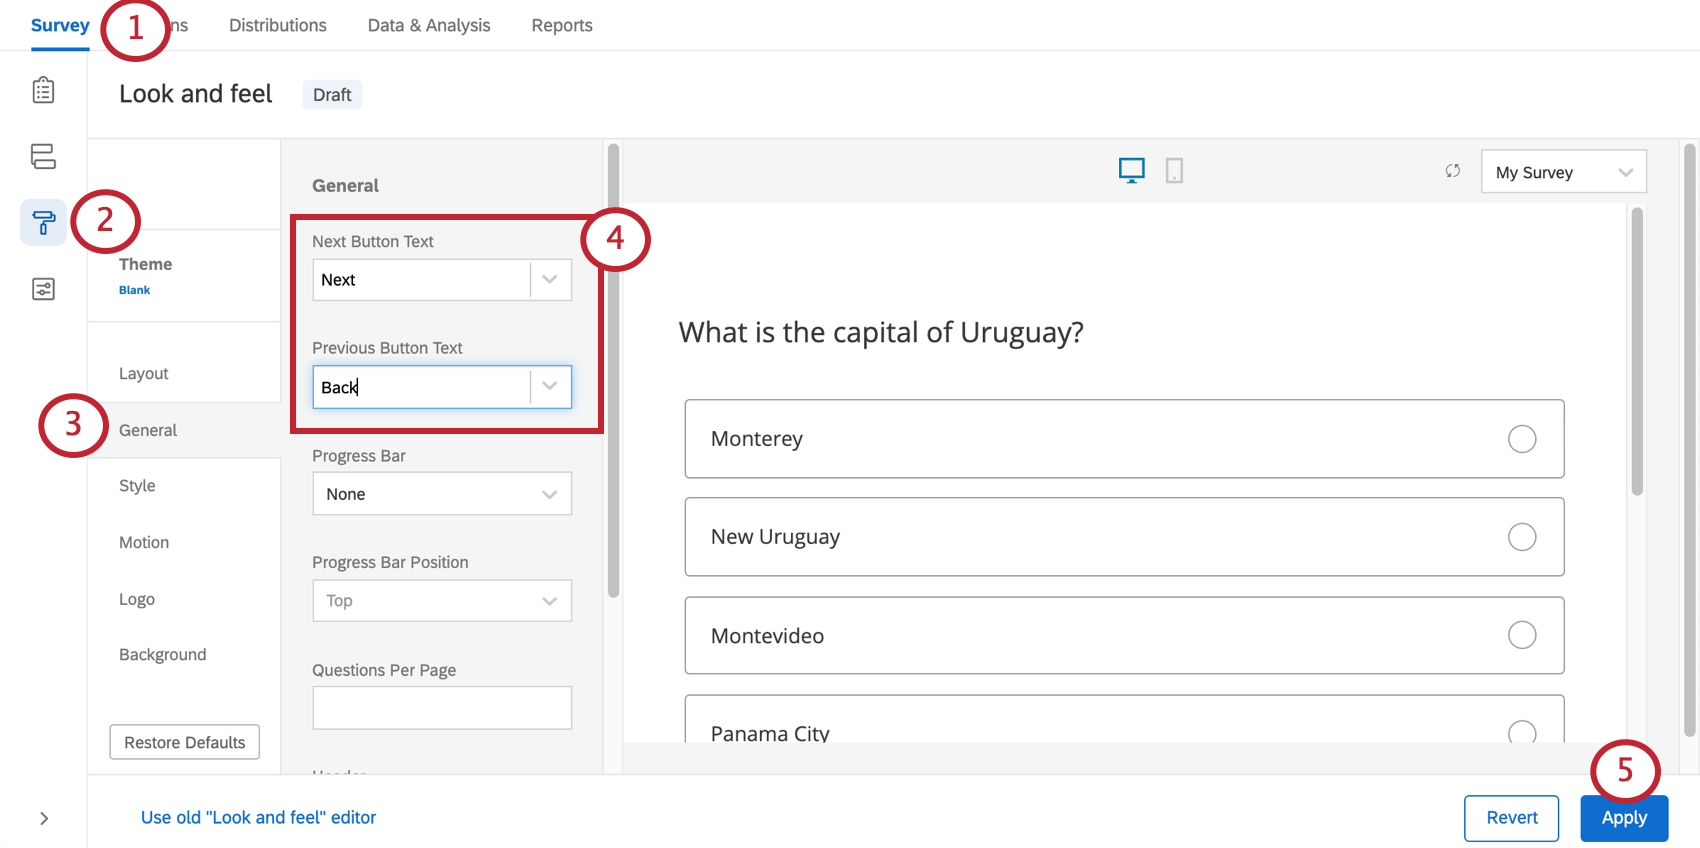
- Navigate to the Survey tab.
- Open Look and feel.
- Go to the General section.
- Type new text into the Next Button Text and Previous Button Text boxes. Please note that you cannot use HTML or other rich content edits to the next and back button text.
- Click Apply.
To change button text for one page of the survey
- Place the questions on that survey page into their own question block.
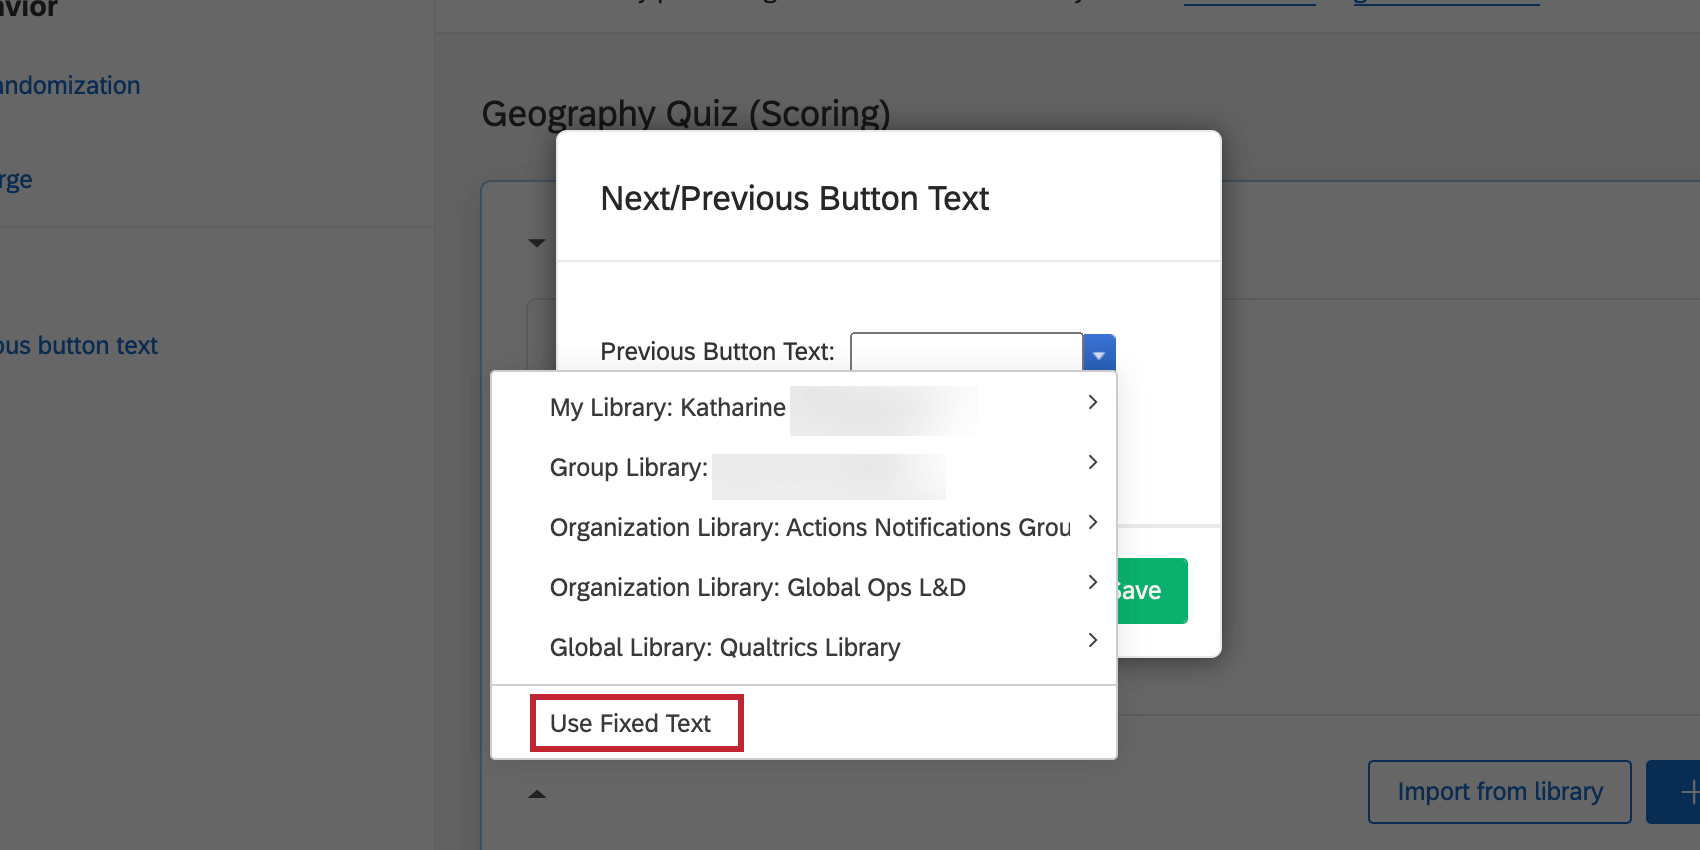
- Select the block (not a question in the block) and then select Next/Previous Button Text.
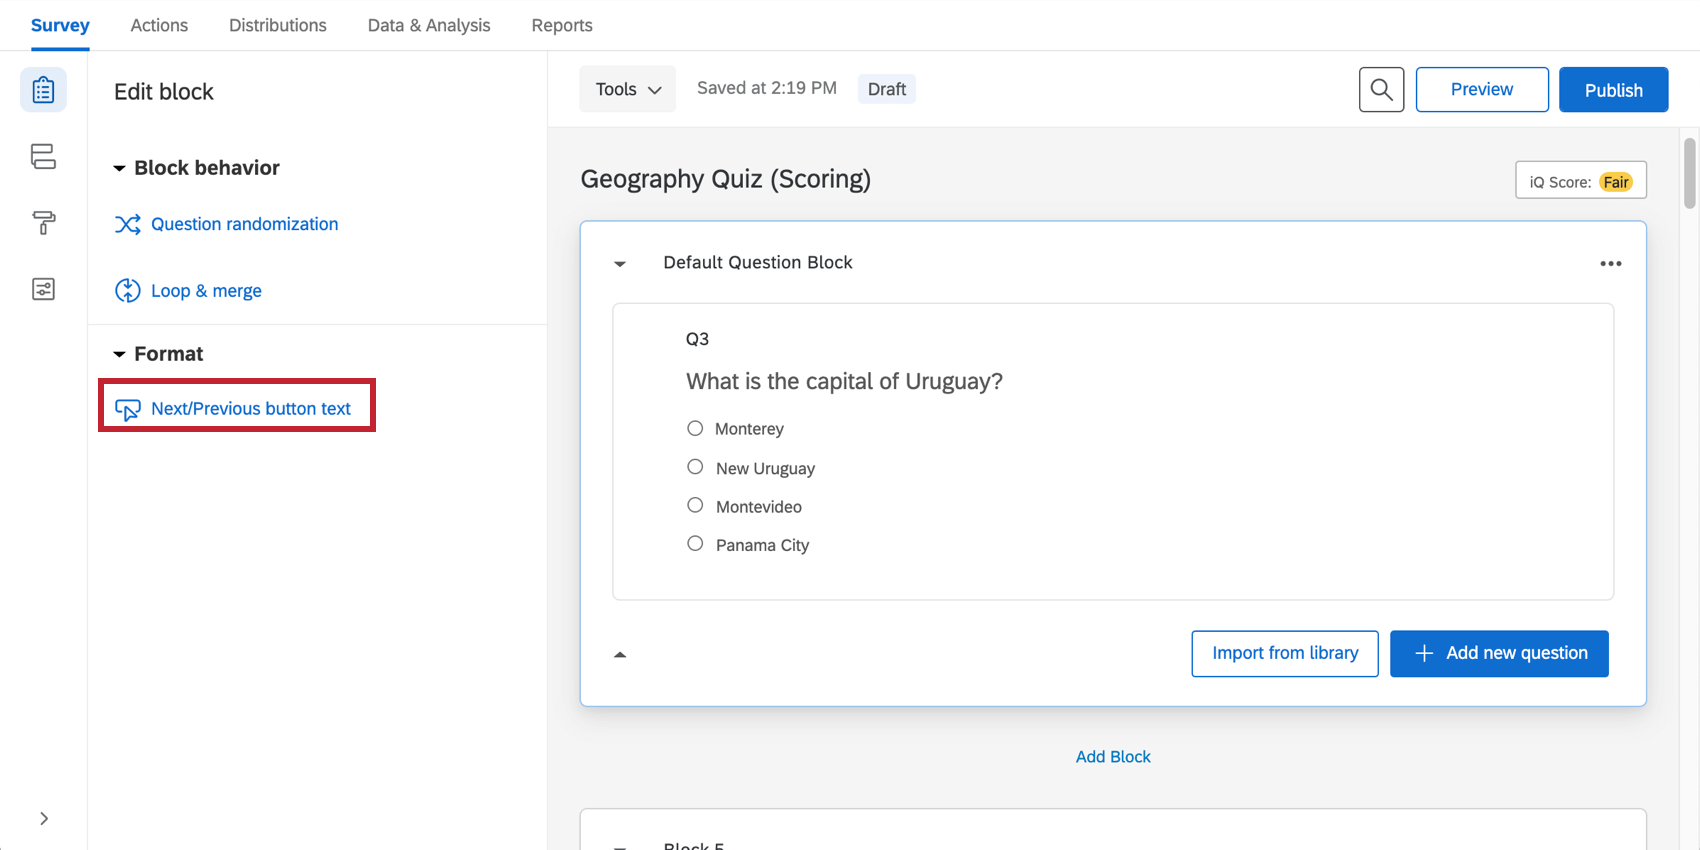
- Type new text for your buttons.

- Click Save.
To translate the Next / Previous button text
- When editing the button text (either while editing a block or in the Look and feel editor), click the blue dropdown.
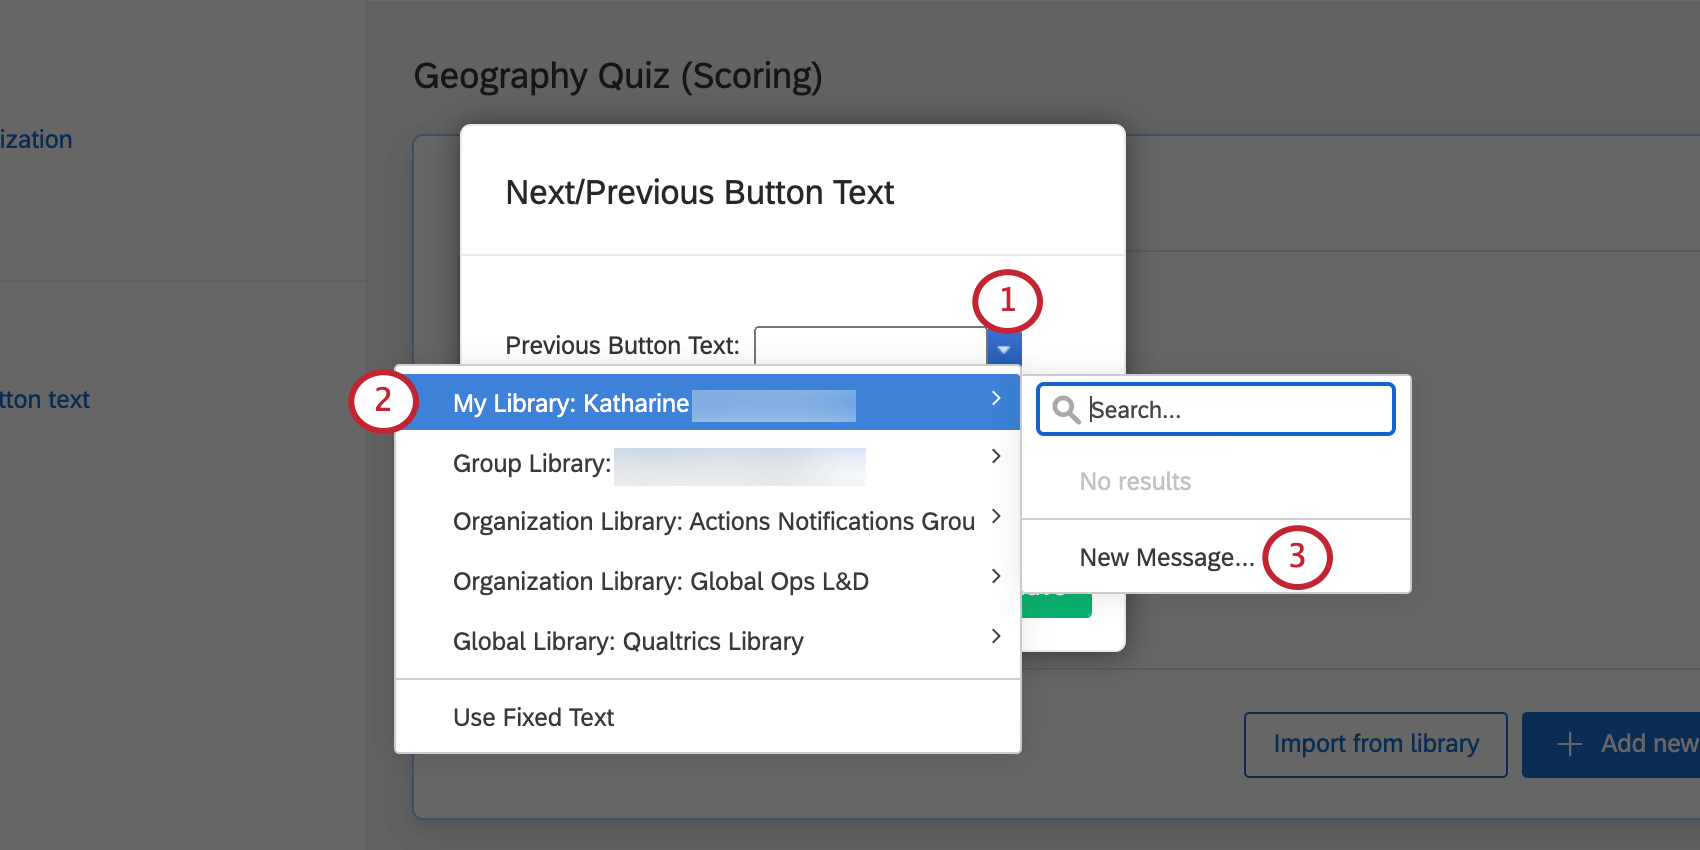
- Hover over a library where you’d like to save the translation.
- Click New Message.
- While in the message editor, type the button text in your default survey language.
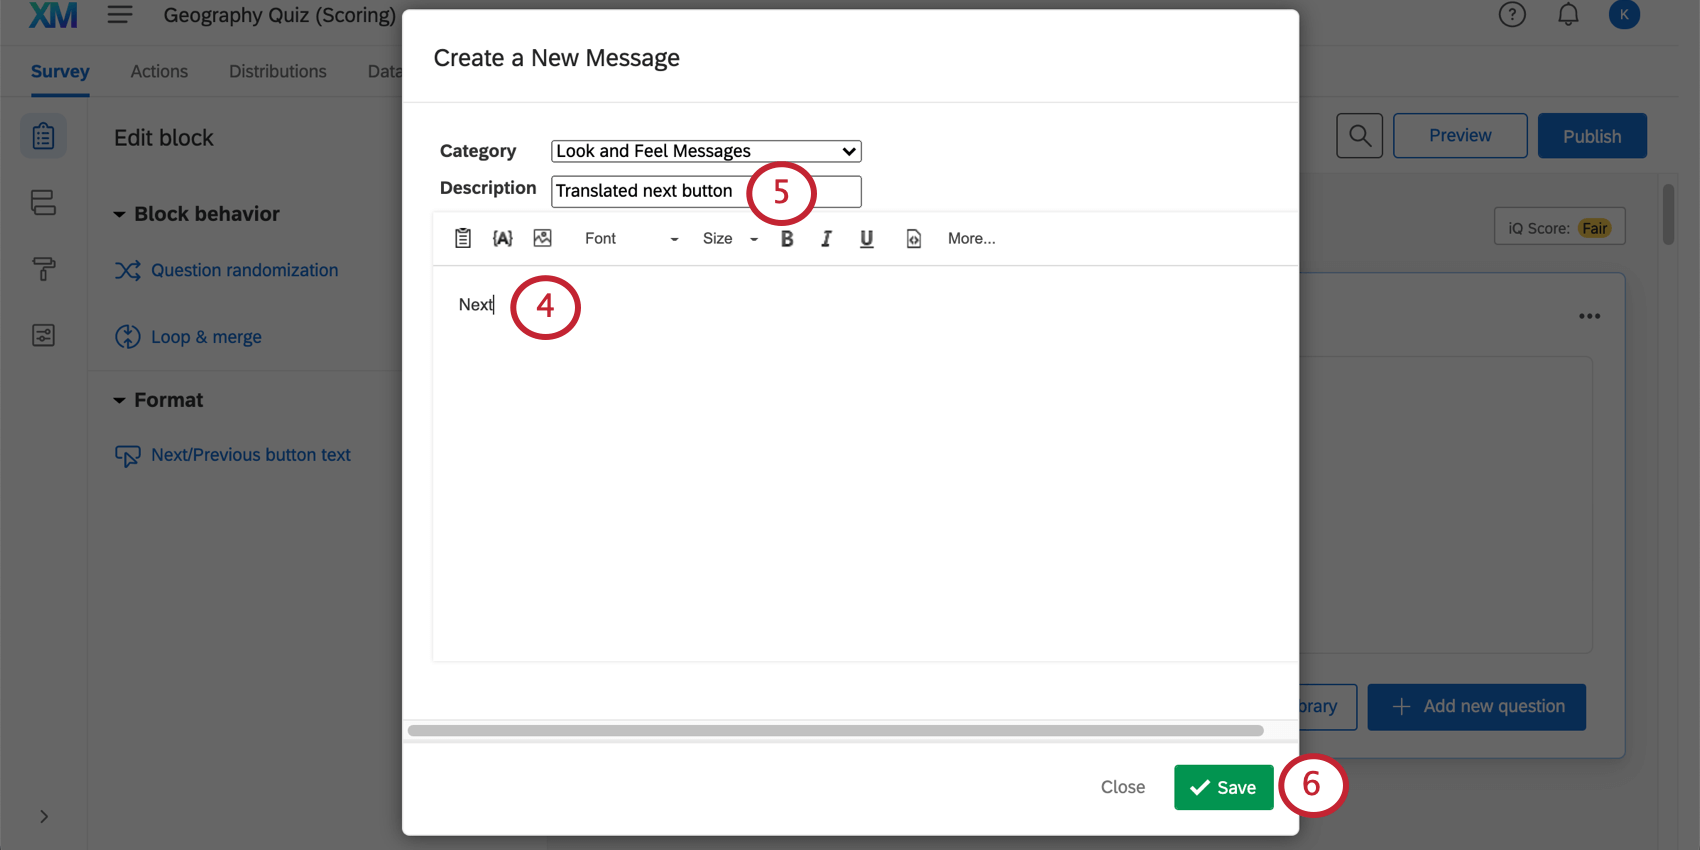
- Give your message a description.
- Save the message.
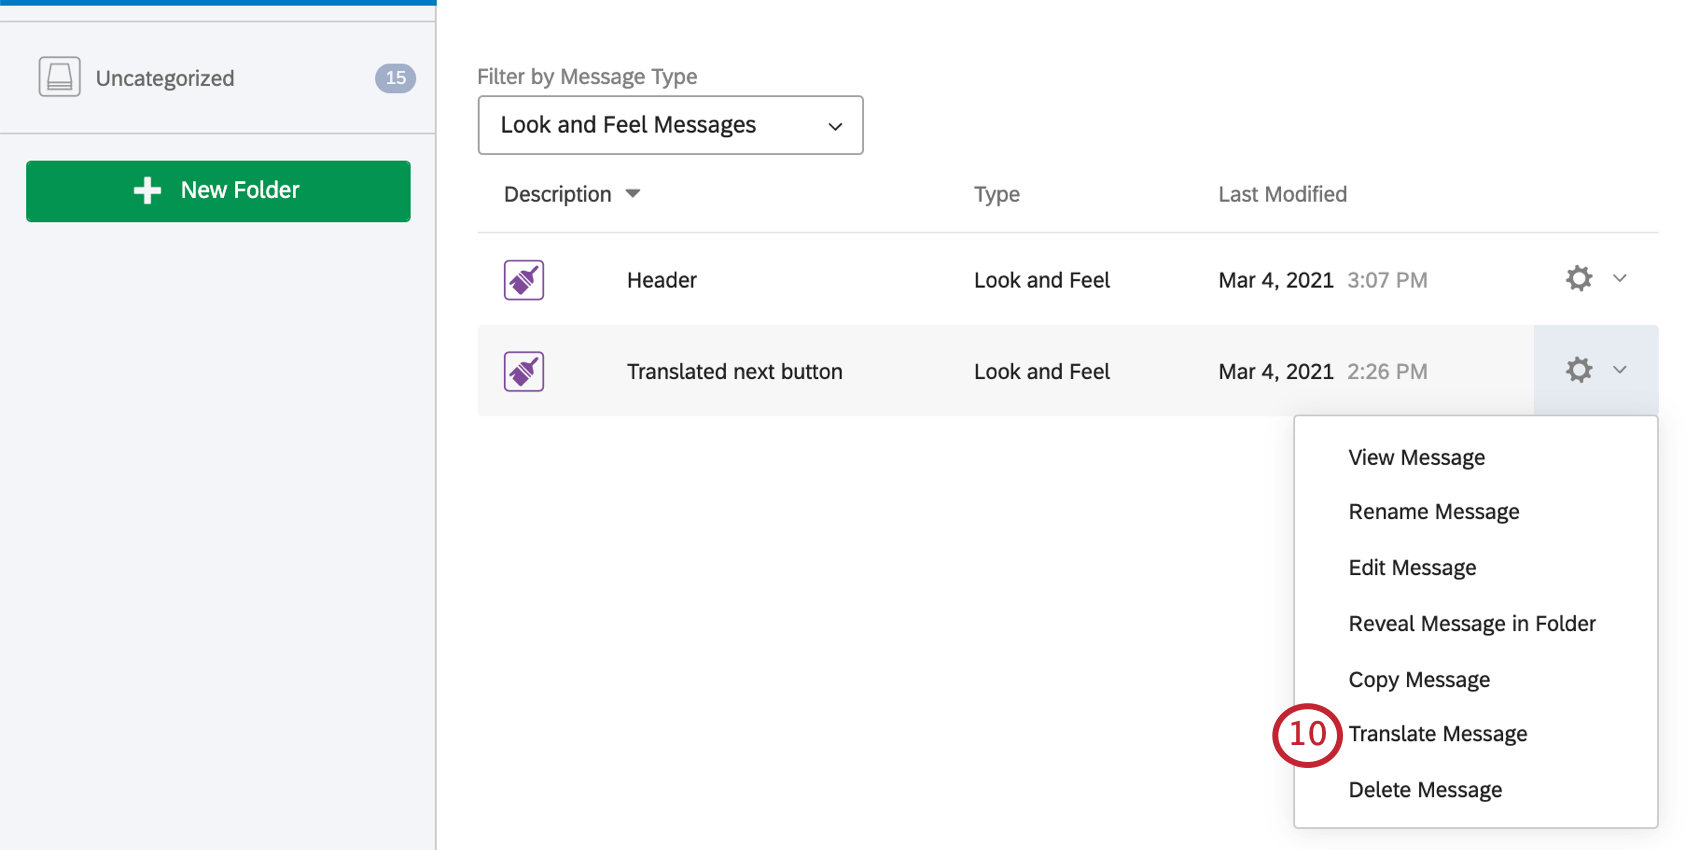
- Navigate to the Library page.
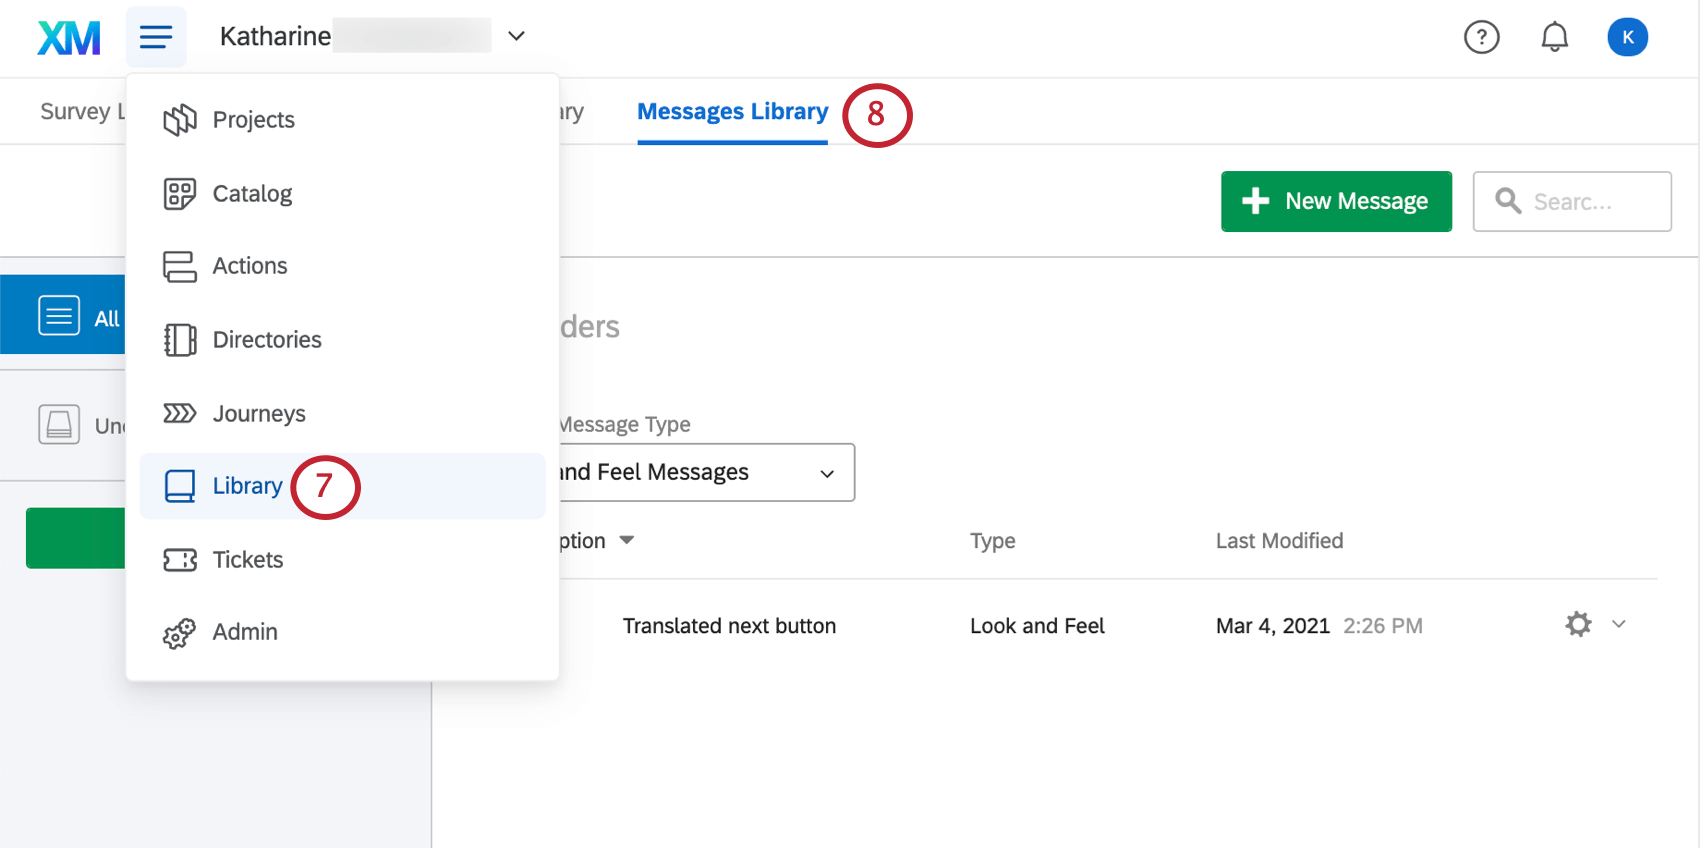
- Select Messages Library.
- Click the gray gear dropdown menu next to your message and choose Translate Message.
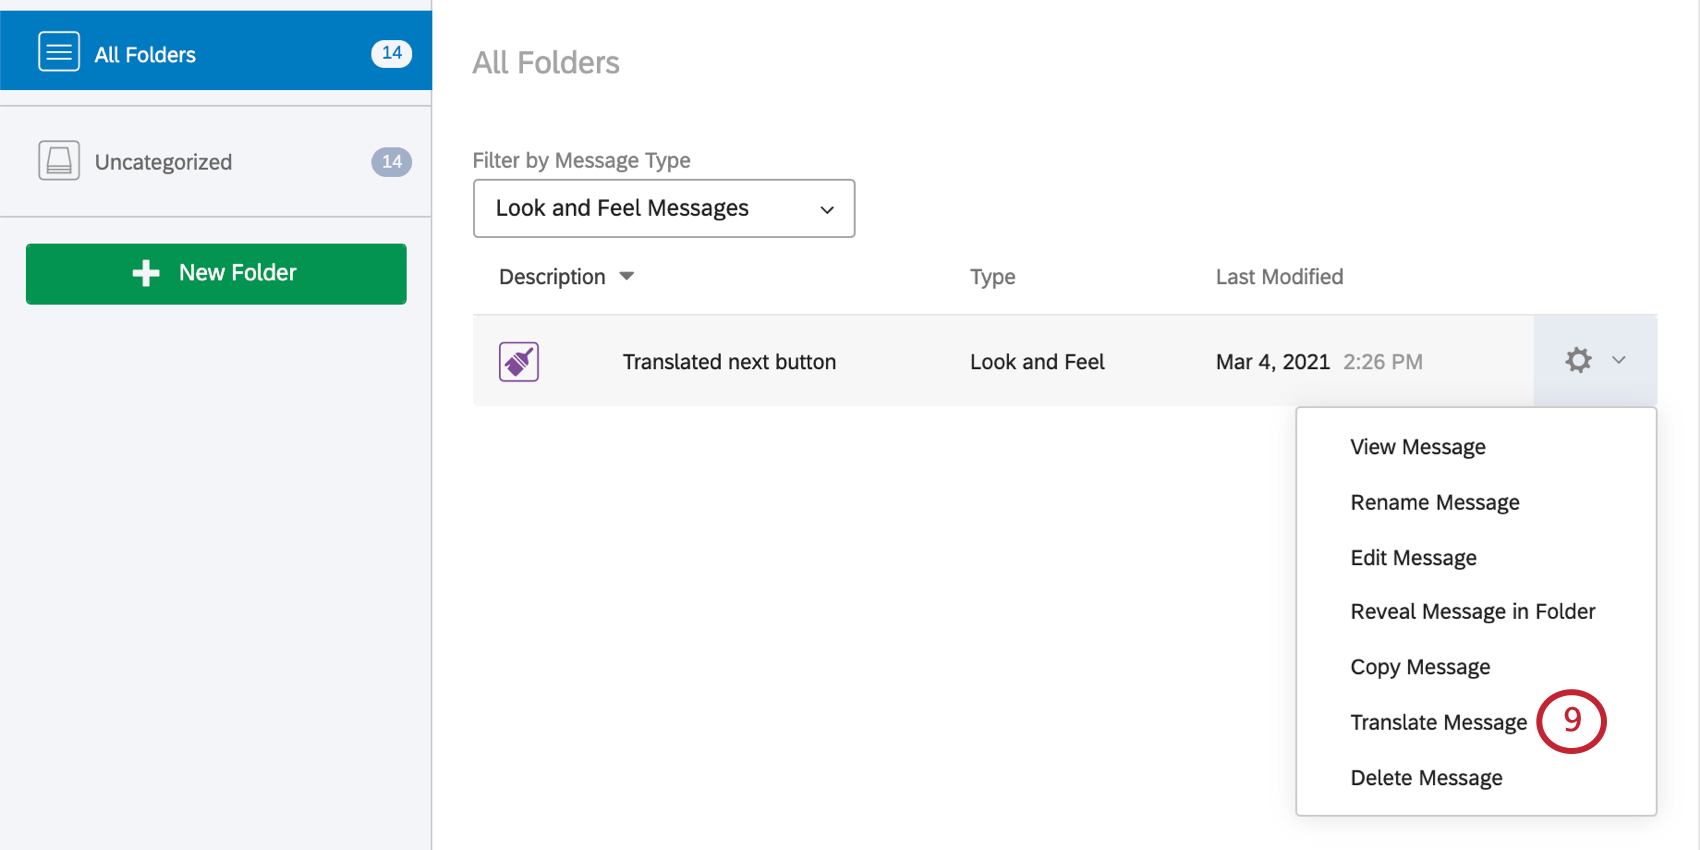
- Translate your message according to the guidelines on the Translating Messages page.
Adding a Progress Bar
With a progress bar, participants can see how far along they are in the survey. We generally recommend a progress bar over question numbers because it gives participants an idea of both how far they’ve come and how much further they have to go.
To add a Progress Bar
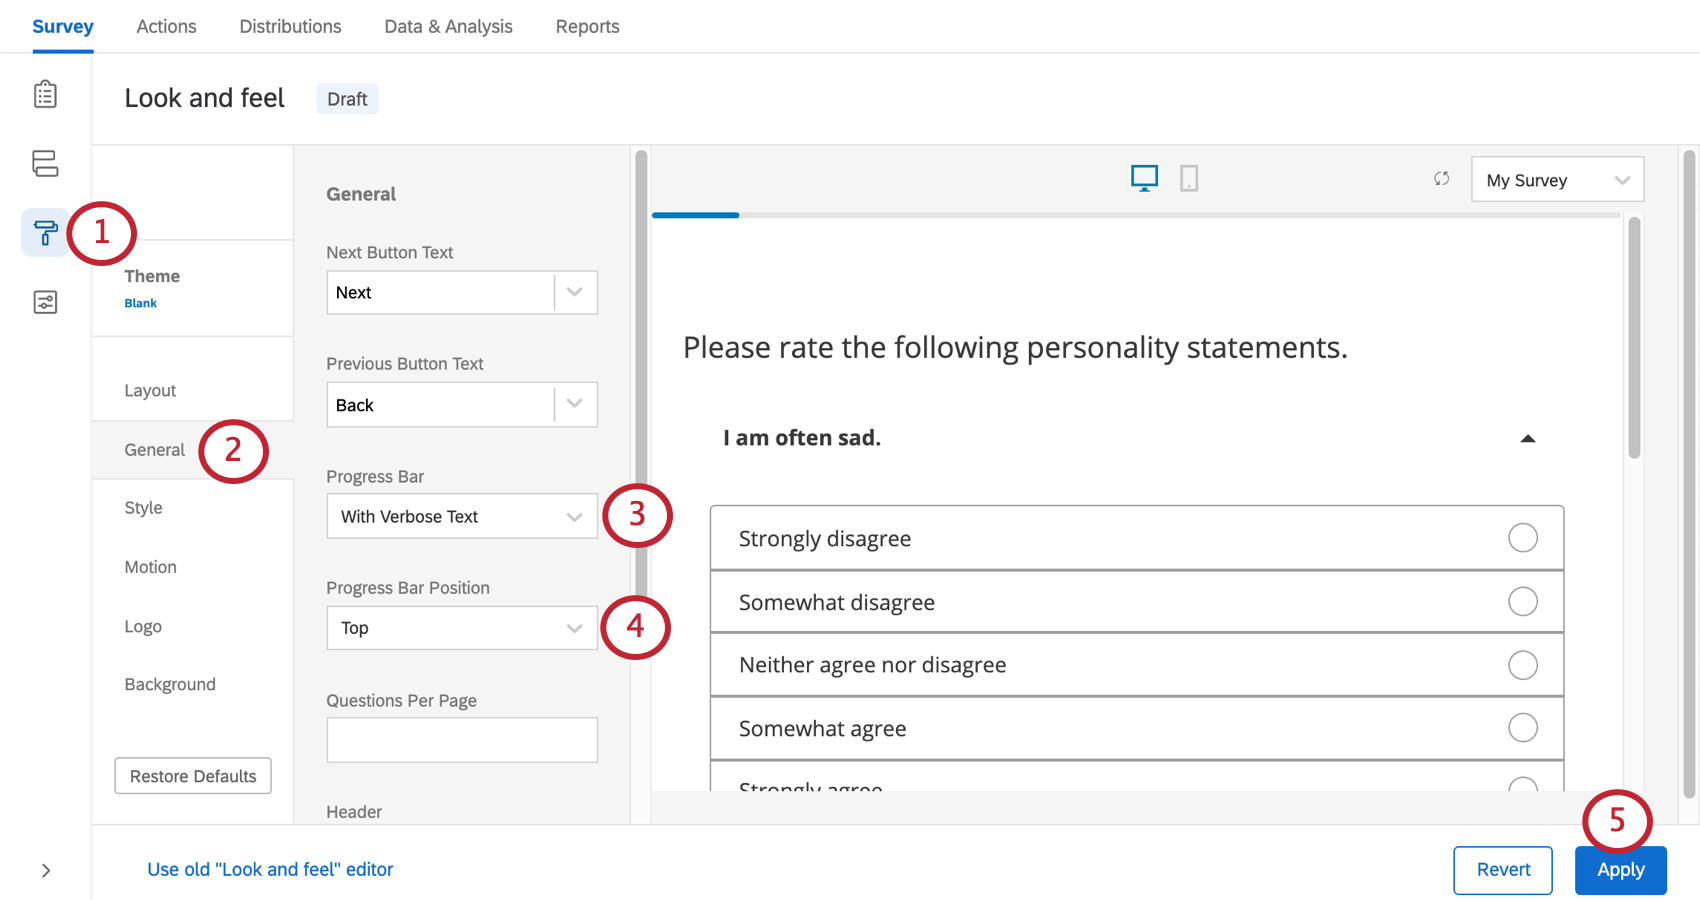
- Navigate to the Survey tab and open Look and feel.
- Go to the General section.
- Select a progress bar style from the Progress Bar dropdown.
- None: No progress bar.
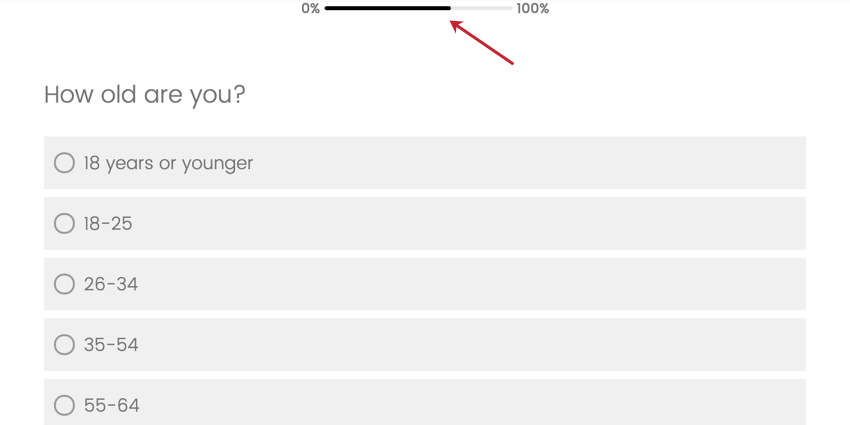
- With Text: A progress bar with 0% and 100% labeled at the ends.
- Without Text: A progress bar with no extra text.
- With Verbose Text: A progress bar labeled with “Survey Completion” and with 0% and 100% labeled at the ends.
- Determine if the Progress Bar Position is at the top or bottom of your survey.
- Apply your changes.
Specifying Questions Per Page
By default, your entire survey will show up on one page unless you have added page breaks or logic to your questions. The questions per page feature is a quick way to add page breaks automatically, saving you time as you create longer surveys.
To specify a set number of questions per page
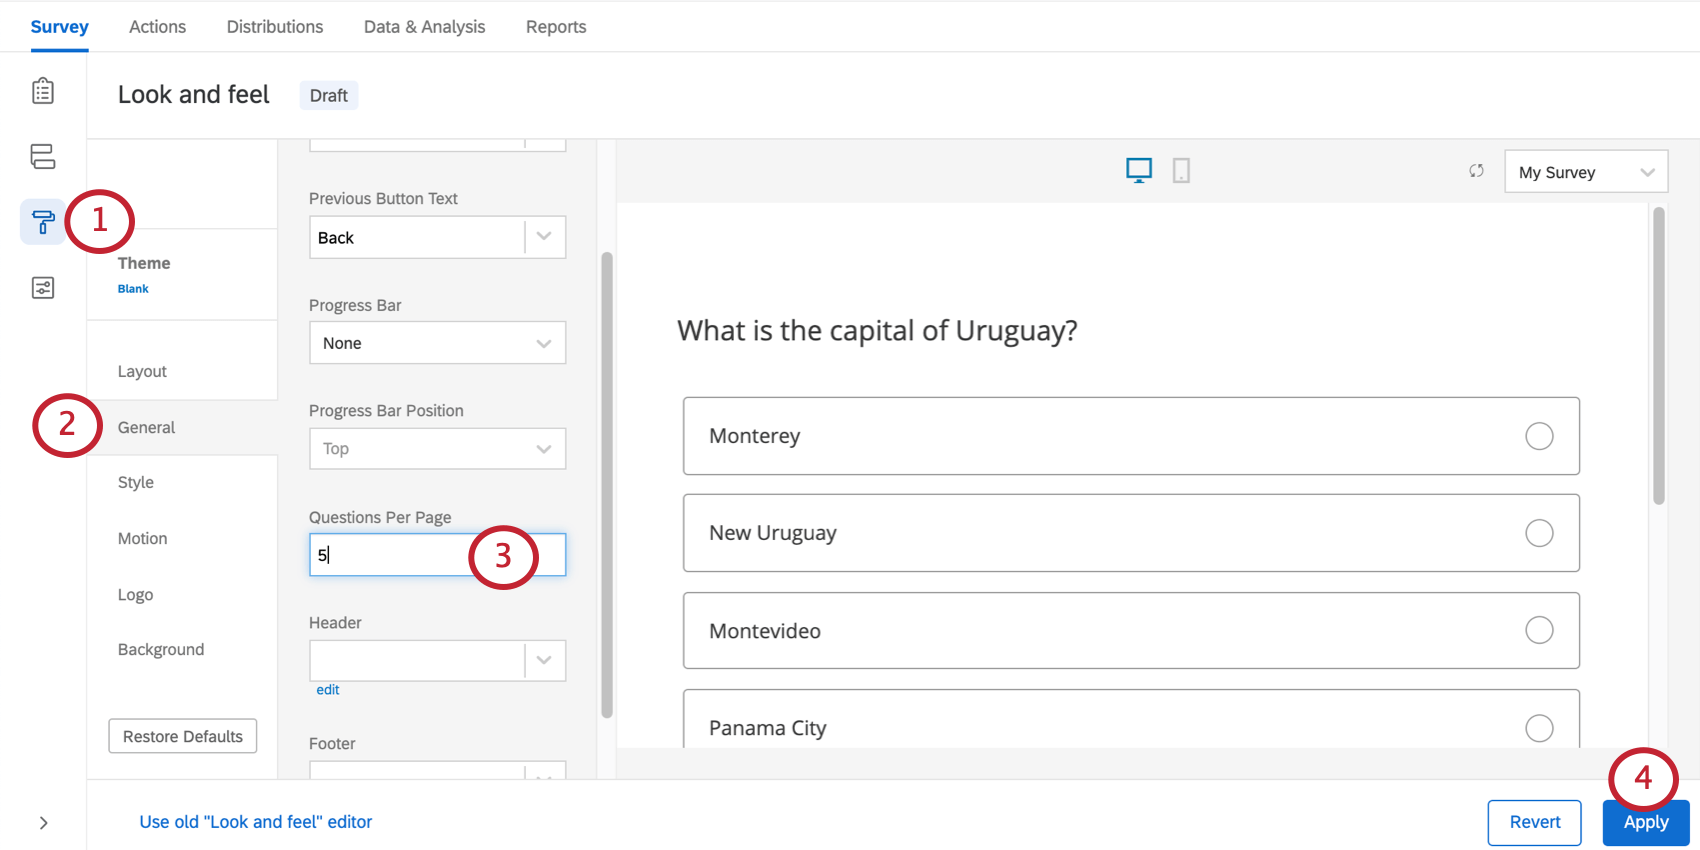
- Navigate to the Survey tab and open Look and feel.
- Go to the General section.
- Type a new number in the Questions Per Page field.
- Apply your changes.
Adding a Survey Header/Footer
Survey headers and footers are useful for displaying content on every page of your survey at either the top or bottom of the page. You can use these fields to add a custom company logo, a survey title, or help instructions for your survey respondents.
To add a header/footer:
- Navigate to the Survey tab and open the Look and feel menu.
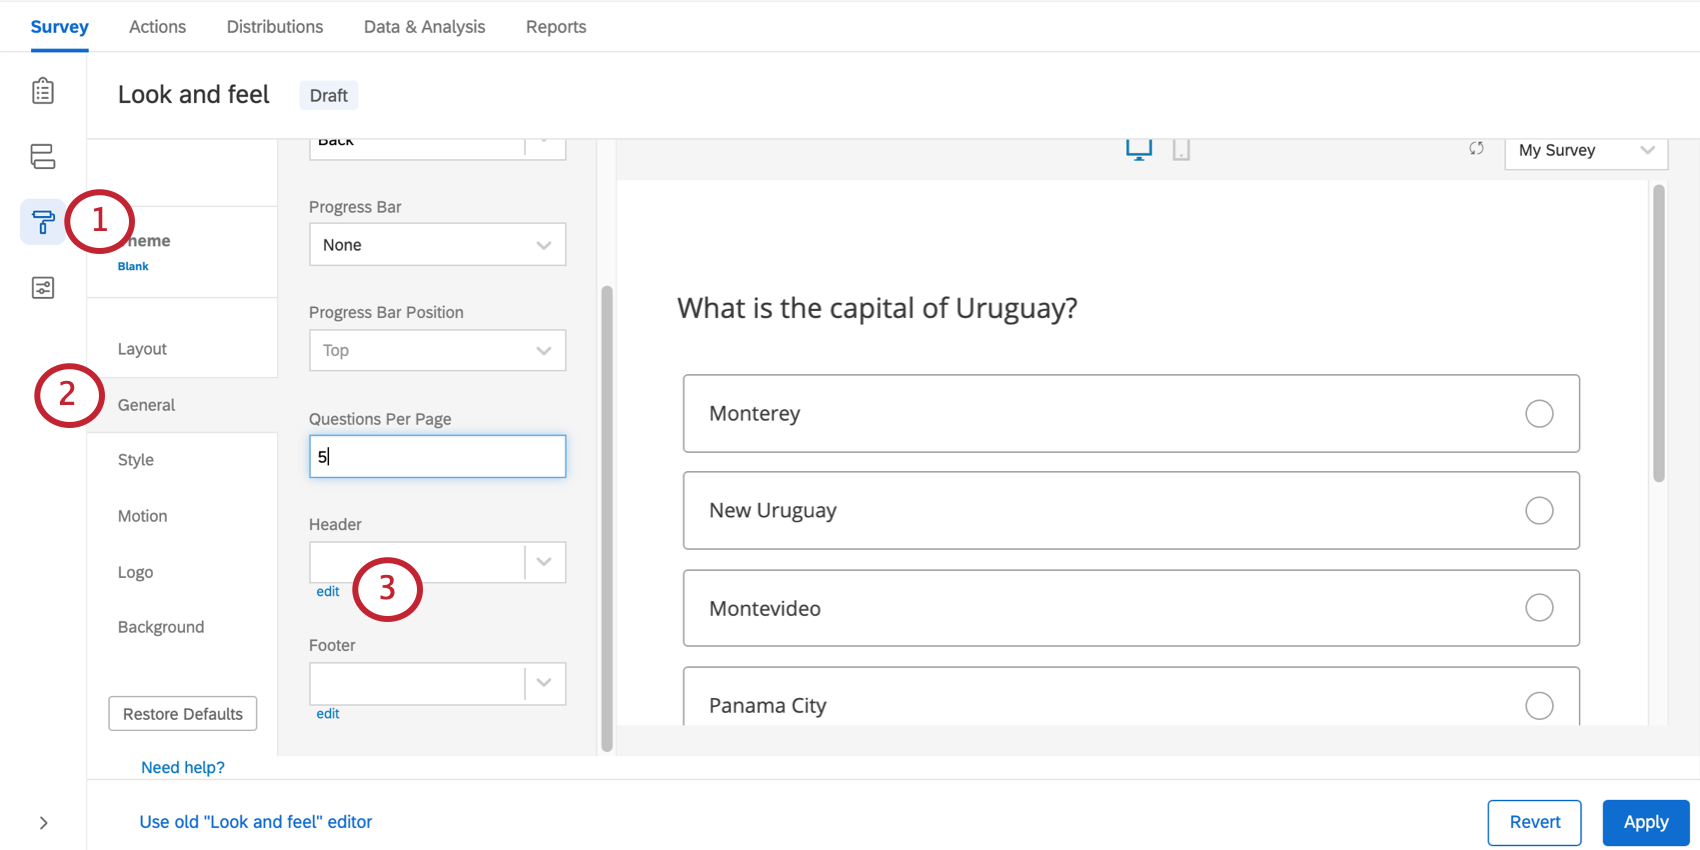
- Go to the General section.
- Enter your header or footer content into the respective text box. Click edit to access the rich content editor.
Qtip: You can also click the dropdown arrow, choose the appropriate library, and click New Message to access the rich content editor and create a header that can be translated and used in multiple surveys.
- In the rich content editor, add and format text and/or images.
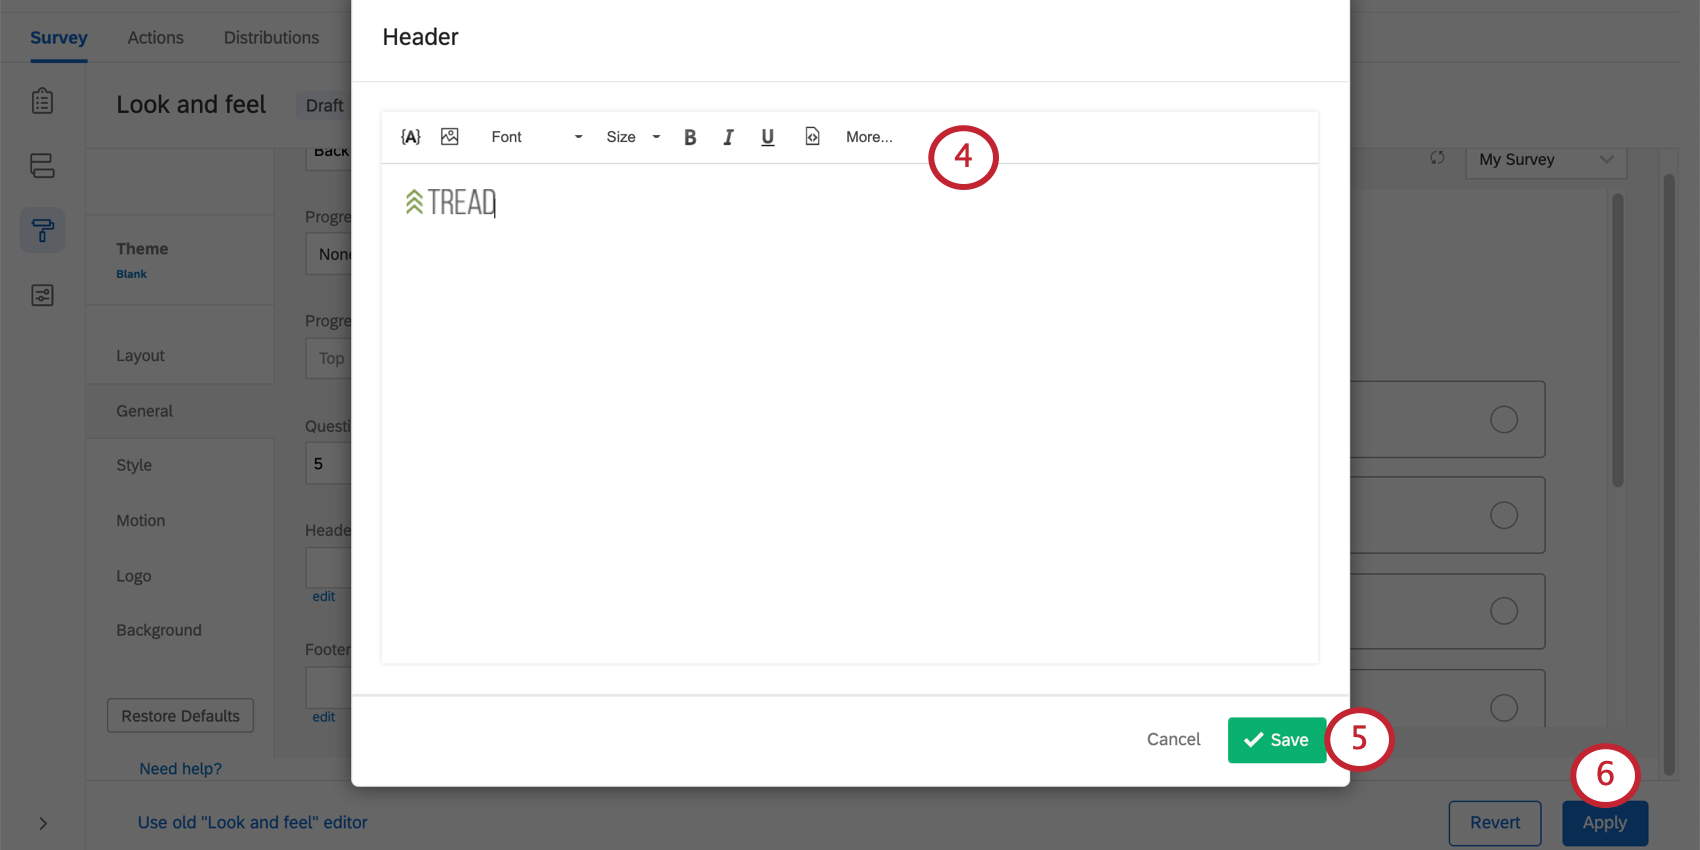
- Click Save.
- Click Apply.
To Translate Header/Footer Text
- Navigate to the Survey tab and open the Look and feel menu.

- Go to the General section.
- Click the dropdown arrow next to the header or footer you’d like to translate. Choose a library and select New Message.
- Give your message a description.
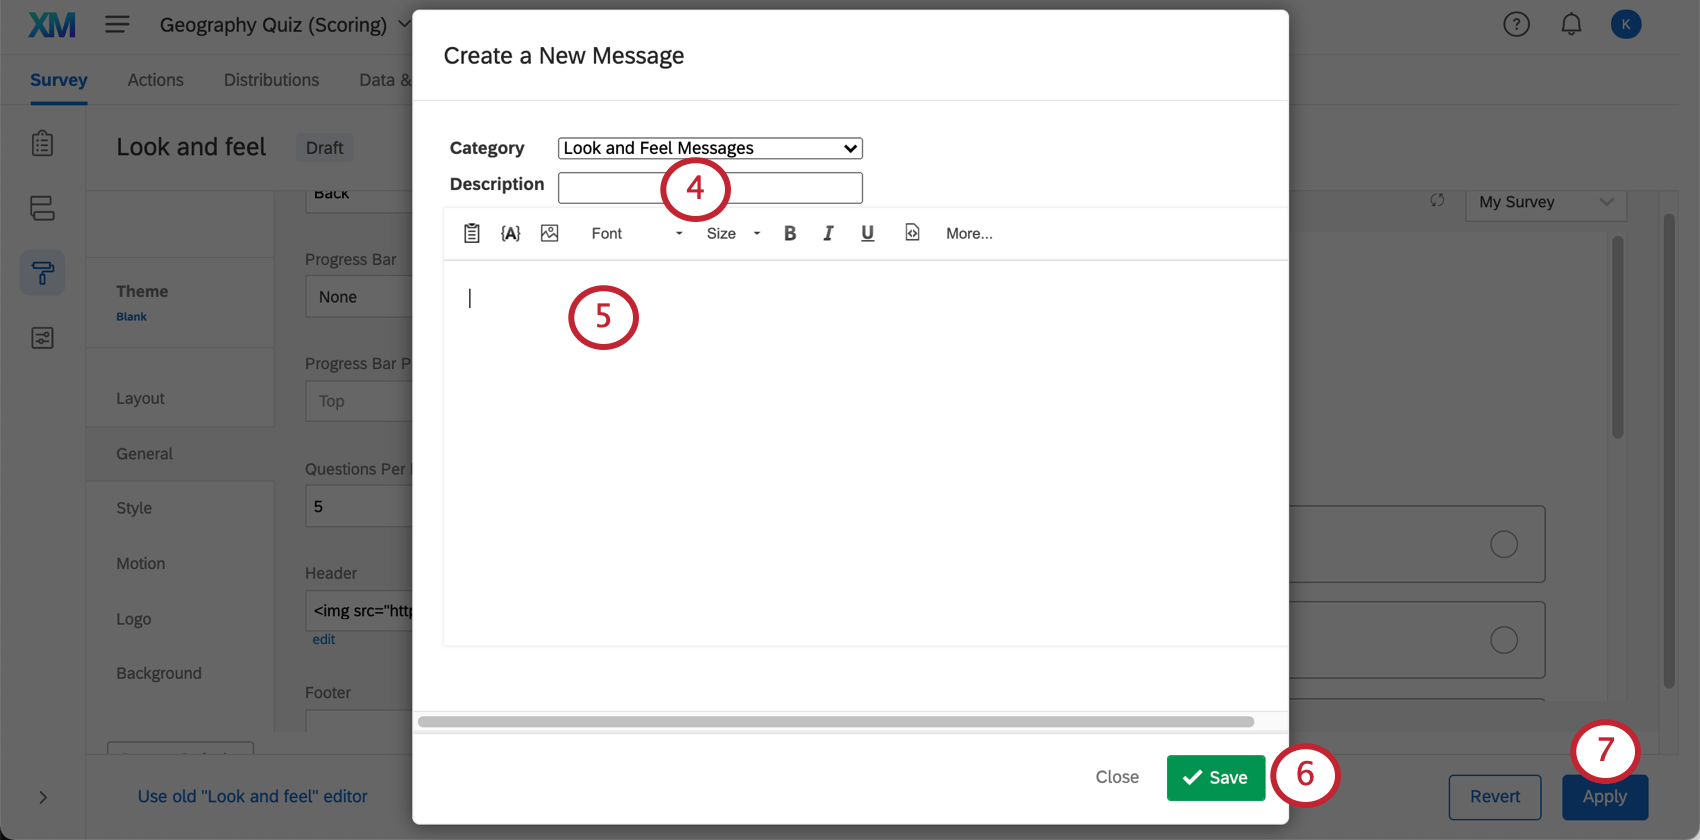
- Type your header/footer text in the survey’s default language.
- Click Save.
- Click Apply.
- Navigate to the Library page.
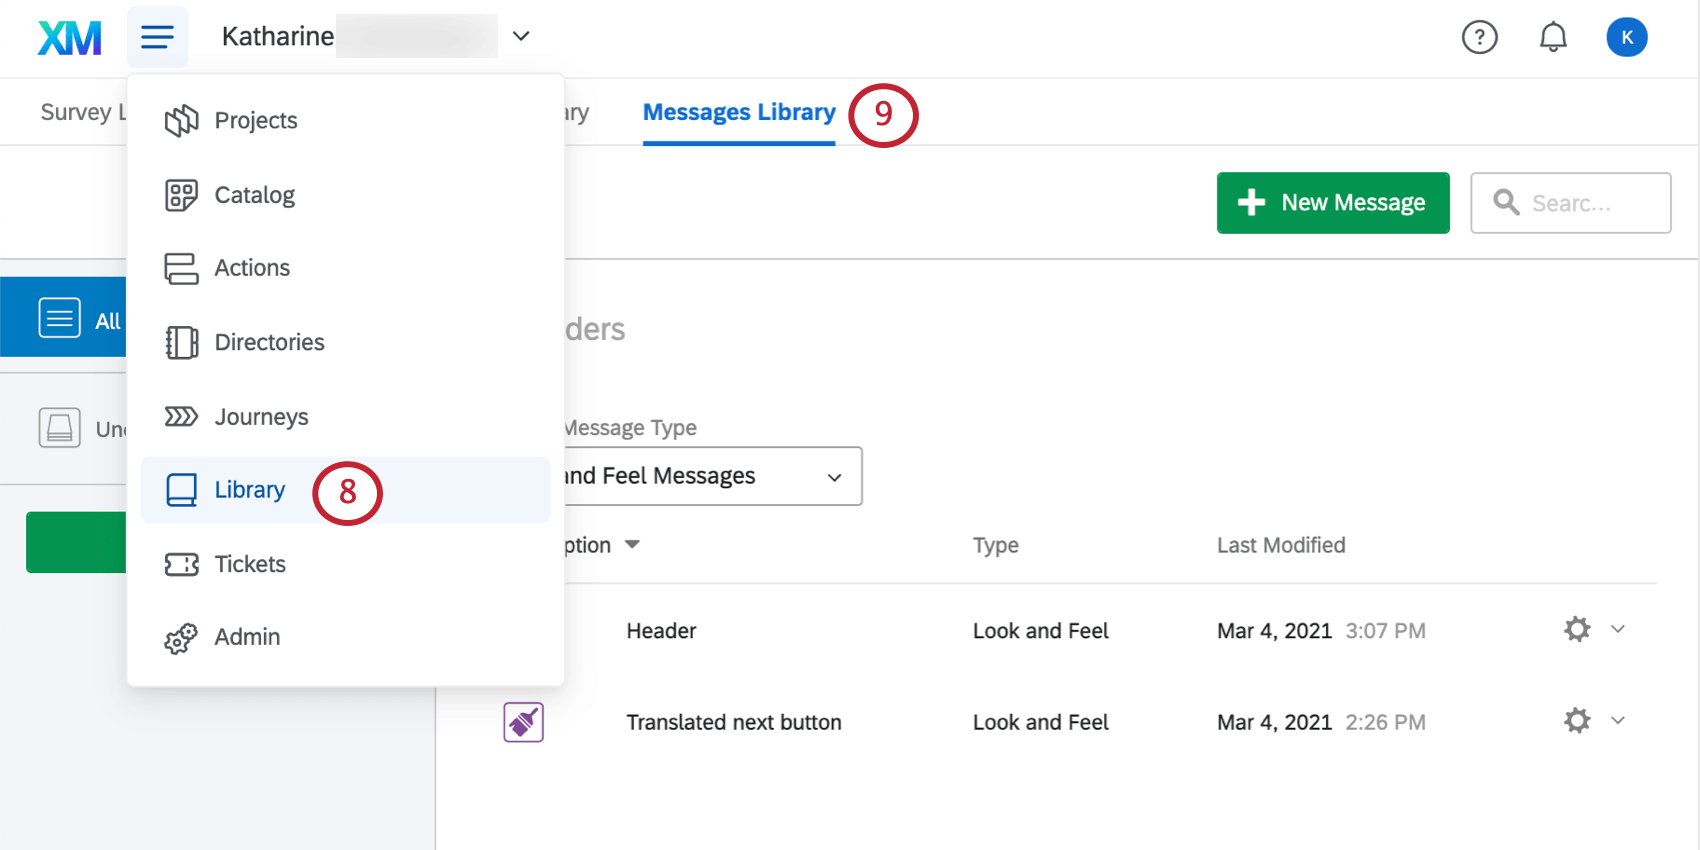
- Open your Messages Library.
- Click the gray gear dropdown menu next to your message and select Translate Message.
- Translate your message according to the guidelines on the Translate Survey page.